Showing posts with label scarf. Show all posts

Tuesday, January 5, 2016

DIY: Free Crochet Pattern // Crochet Headband & Cowl // Two in One!

Hello there! Happy New Year to you! I wanted to create a two in one project that could be utilized for either or. I love the idea of having options when it comes to my accessories, so this free crochet pattern for this crochet headband/crochet cowl was formed from that idea!
Ingredients:    


Crochet Hook>> USJ10/6.00MM  Craft Scissors   Yarn Sewing Needle
  Yarn used>>1 Skein [Viva Bernat Yarn] 


  Stitch guide:    HDC= half double crochet// SC=single crochet// DC=double crochet// SS= slip stitch //ST(S)= stitch(es)// CH= chain RND[number]= Round
CH 47 [note: this is for the circumference of your head. So you might want to test/measure your own for the perfect fit!]
Connect the last ST to the very first ST by SS. You will be working in rounds.
RND1: HDC into all of the STS for the entire Row, at the very end of the Row, you will connect by SS.
RND2: CH 1, YO once onto the hook, insert hook in between the previous Rows STS, YO again, pull the strands on the hook through, YO again to pull ALL of the strands on the hook through...[You will repeat this method until the very end of the Row, at the very end of the Row, you will connect by SS.] [Photo Above on the Right for Reference.]
RND3: HDC into all of the STS for the entire Row, at the very end of the Row, you will connect by SS.
RND4: CH 1, YO once onto the hook, insert hook in between the previous Rows STS, YO again, pull the strands on the hook through, YO again to pull ALL of the strands on the hook through...[You will repeat this method until the very end of the Row, at the very end of the Row, you will connect by SS.]
RND5: HDC into all of the STS for the entire Row, at the very end of the Row, you will connect by SS.
RND6: CH 1, YO once onto the hook, insert hook in between the previous Rows STS, YO again, pull the strands on the hook through, YO again to pull ALL of the strands on the hook through...[You will repeat this method until the very end of the Row, at the very end of the Row, you will connect by SS.]
RND7: SC into all of the STS for the entire Row, at the very end of the Row, complete work with an SS.
*Tag your creations with #thedreamcrochet
ashlee elle.

Monday, January 13, 2014

Shoppe Update!

Hello there! Here is a new item I am adding to my Etsy, for only 20 bucks! It's a long scarf with a loose stitch. You can wrap this scarf around about 3 times for a more cozy feel! I am creating them in several colors including, cream/white/black/brown/scarlet red/teal/grey/beige/navy to name a few. Personally, I initially made a handful of them for myself, but I thought why not add it to the shoppe? The more the merrier! The scarves are quite light in weight, but they keep you warm without that heavy feeling.

Here is  the shoppe for more details! :)


Tuesday, January 7, 2014

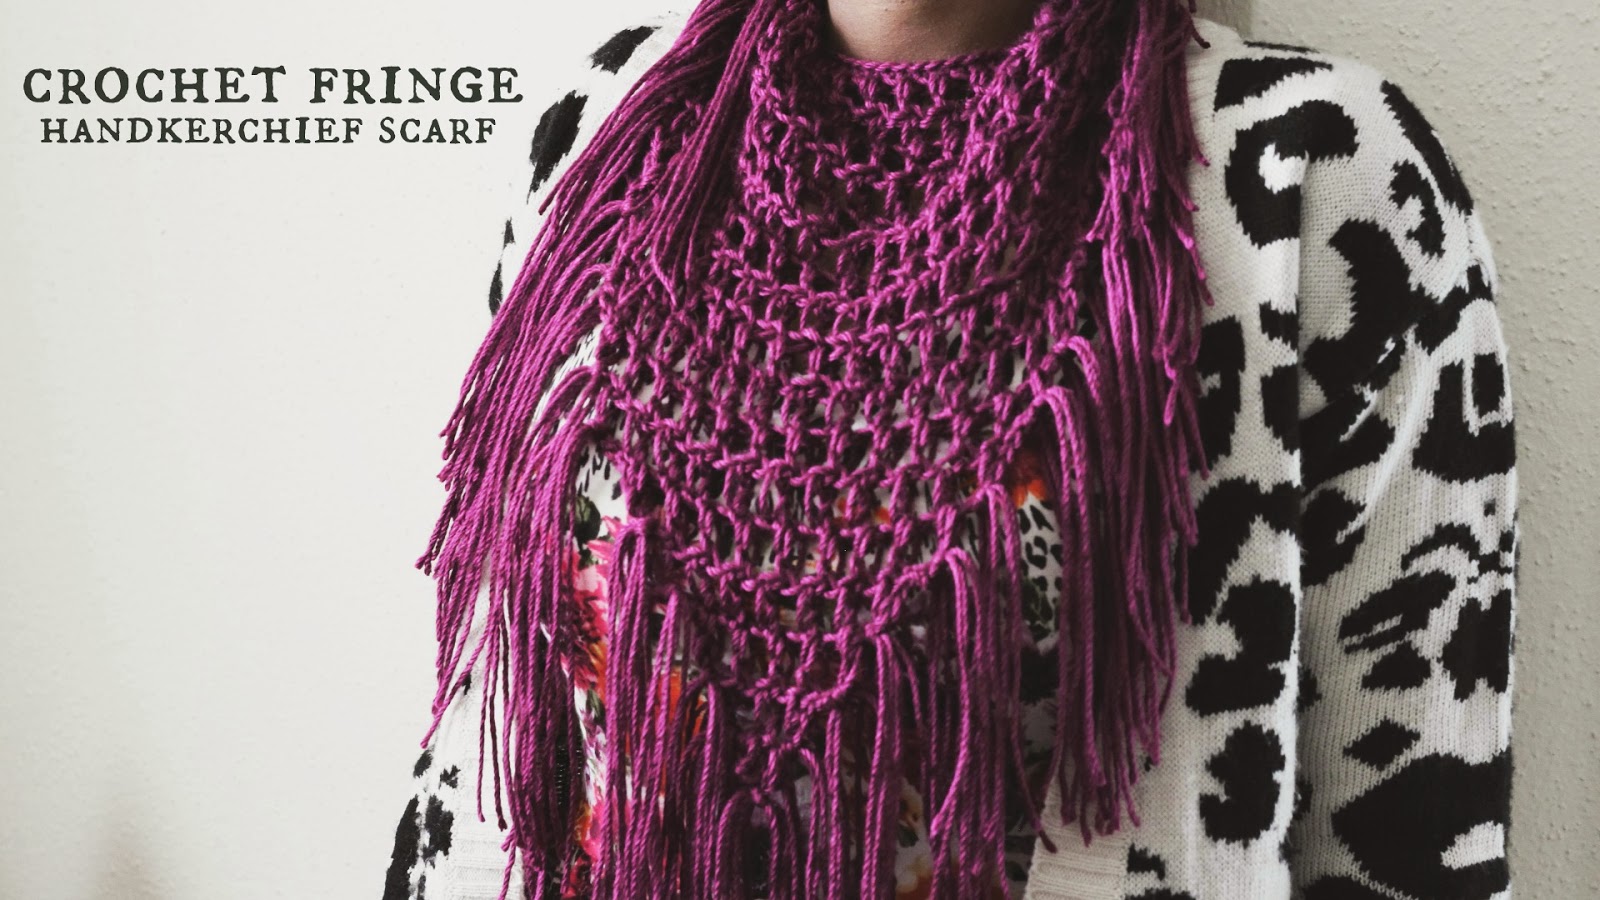
DIY: Crochet Fringe Handkerchief Scarf.

I have been wanting to create this scarf for quite awhile, I also want to create a larger scale version of it as well.  Though here is a free pattern to make one for yourself! I am a lover of fringe though if you are not, you can entirely eliminate the fringe part and modify if you desire!
The Ingredients:
>> Scissors
>> H/8-5.00 MM Crochet Hook
>> The yarn I used// Caron Simply Soft Yarn (Passion) 

Crochet Techniques with abbreviations:
>>SC= Single Crochet
>>HDC=Half Double Crochet
>>SS=Slip Stitch
>>CH=Chain
>>DC=Double Crochet 

Video Links for Decreasing using Single Crochet

Video Links for Solomon's Love Knot
CH 70
Turn and HCD entire ROW 1
After you hit the last ST
Turn for the Next Row (Row 2)
You will skip 2 STS
For Row 3
Start the Solomon's Love Knot technique
[start the technique (the solomon's love knot) SC skip a Stitch and use the technique into the following]
 
Once you hit the last 2 STS of the Row
Turn and Decrease 2 STS once again
To start the Solomon's Love Knot technique..

You will repeat this method,
By decreasing 2 STS until you reach Row 18
Until it ends in a point. Knot and cut.
Cut about an inch of yarn, four strips for each of the side rows.
There will be about 33 of the four strips.
You will wrap the yarn in the outside of the STS of the scarf like so, knotting it.

Thursday, January 24, 2013

HandMade: The Polka Dot Infinity Scarf

Hello! I've been wanting to recreate a pattern quite similar to polka dots with a crochet technique, so I created it upon this scarf. A mix of grey and pink yarn, looped around creating an infinity scarf. With the desire of re-opening my etsy store, hopefully in a month or two, I want to feature infinity scarfs, with a bit of twist to it. Mucho fun!
 

Saturday, January 12, 2013

The Tutorial: The Crochet Bow Scarf.

I have been admiring this scarf for quite awhile and I have been truly wanting to create something similar to what I have seen on the internets. Please let me know if you have any trouble following this tutorial. I find writing it so much more difficult than one can imagine for some reason! Anywho! Here is a tutorial on how I created the crochet bow scarf!
Ingredients:
Yarn
Scissors
Crochet Needle
Crochet Hook (I used J/10-6.00MM


For The Scarf:
CH 14
ROW 1: SC in first stitch
HDC in second stitch alternate between SC and HDC until Row 74
Row 74: Slip Stitch, Knot and cut.
SC around the scarf, the edges. Slip stitch the end, knot and cut.
Cut a piece of yarn.
Place scarf around neck, combine them, find a location where you want to place the bow and tie the piece of yarn into a knot on around the scarf.
Take the scarf off, set aside so that you can start on the bow!

The Bow:
CH 14
ROW 1: SC in first stitch
HDC in second stitch alternate between SC and HDC until Row 24
SC around the scarf, the edges. Slip stitch the end, knot and cut.
Fold it in half and sew the edges together.
Cut a piece of yarn.
Tie it around the piece and knot it tightly.

The Strip Around The Bow:

CH4
SC into each stitch into row 8
Wrap it around the body of the bow
Knot it tightly around the bow and sew the back of it.

To attach the bow to the scarf, you are going to sew the bow onto the scarf where it is knotted and tie together.
After you have made it tightly, you are finished.
Place the scarf around your neck and wear it out!