Hello there! I've been wanting to create one of these little charm bracelets for awhile now and finally here they are! Actually, I was browsing around Michael's Craft Store as usual over the weekend, I was looking through the jewelry section when these little bits of inspiration hit me. Two of my favorite words that really hit me is Dream and Create. It is what I am all about and I am more than happy to share it!
Ingredients:
Loops and Threads Woolike (Colors (Mauve & Sage))
2 Metal Connectors by ShortCuts
Scissors
Crochet Hook B1-2.25MM
Yarn Sewing Needle and a Button (not shown)
Abbreviations:
SC=single crochet
HDC=half double crochet
SS=Slip Stitch
CH=Chain
YO=Yarn Over
For the "Create Bracelet":
Using the Sage yarn.
Measure your wrist, for your own preferential size.
CH 38, Turn
HDC the entire first Row of the CH.
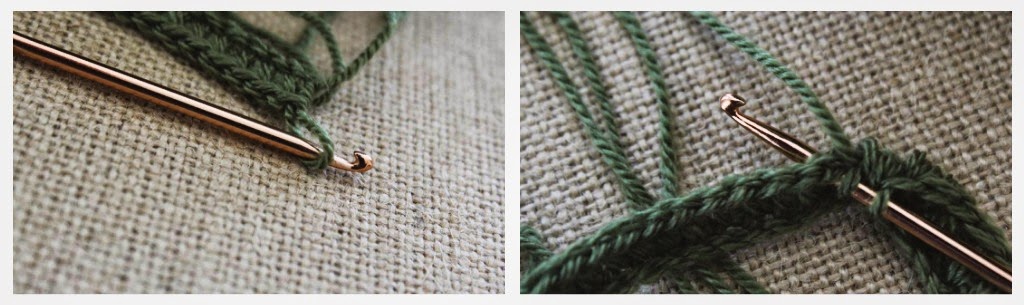
For the 2nd Row, YO, insert hook into the space underneath the stitch (photo on the right above)
YO, Pull through all 4.
You will continue this process through out the entire Row.
At the end of the Row, Tie off, cut, sew in the remaining yarn.
Next, You will insert the crochet piece through the metal connector.
With the button and the yarn sewing needle, you will thread it through and sew it to the end of the crochet piece.
For the Dream Bracelet:
You will CH 40 with the Mauve yarn.
Connecting the last ST to the very ST.
You will SC the entire Row.
Connecting the last ST to the very ST, once again.
At the end of the Row, Tie off the remaining yarn.
Pulling the yarn through the metal connector hole, you will knot it around, along with the other side.
Keep creating and dreaming!
ashlee elle.
Happy Tuesday to ya! I've been itching to gear some of my crochet items towards Spring. I truly wanted to try my hand on crocheting fabric yarn, either made from t-shirt scraps or even store bought (which is the method I chose) to create something out of it. Hopefully, I will attempt creating my own fabric yarn, I've never tried it before and I'd love to see how it would come out.
I'm a huge fan of accessories and wanted to implement that into the crochet world. So here is a very simple and very easy tutorial on how to crochet a fabric bracelet.
The Ingredients
>> scissors
>> you can create your own or try Lion Brand's Fettuccine fabric yarn
>> crochet hook J/10-6.00MM
Crochet techniques with abbreviations
SC= single crochet
HDC= half double crochet
SS= slip stitch
CH= chain
Left//
You will start a CH of 10 (depends on your wrist size too)
Right//
You will connect the starting ST with the last ST
Left//
Row 1: HDC the entire Row. Connecting the last ST to the first ST.
Right//
Row 2: SC the entire Row. Connecting the last ST to the first ST.
SS, and cut to weave the ends in.
//ashlee elle//