Showing posts with label lion brand yarn. Show all posts

Tuesday, January 16, 2018

Tutorial Tuesday: Crochet Crown Ear Warmer. Free Crochet Pattern.

Hello there!  
I was inspired by the Aerie crown ear warmer [found here] (which is no longer in stores) and I truly wanted to recreate it in more of a chunky fashion. I've created crocheted crowns before though this is the first one I've reconstructed from scratch!

 The Ingredients
Half a skein from Lion Brand's HomeSpun [Bulky 5] (from Michaels)
Craft Scissors
Crochet Hook I/9 5.50MM
Tapestry Sewing Needle

 Abbreviations
sc=single crochet
dc=double crochet
[number]tch[s]=turning chain[s]
sts=stitches

The Pattern
I measured the circumference of my head/hair, my measurements will be a bit bigger because of my braids, though I would recommend sizing your own and crocheting to that specific sizing. [Note: You can always return back to the beginning to create a snug fit, with one round of single crochet.]
I created a measurement of multiples of 7. 
So I chained FOR 42. 
You will be working in rounds, connecting by SS and TCH accordingly.

Creating the base of the Crown.
R1-R4: HDC the entire row, into all of the STS, at end of each round, 2TCHS.

Creating the points of the Crown.
Since I chained 42, multiples of 7. I will create 6 points around the base of the crown.
Each point will be created separately.
R1: HDC for 7 STS, at end of row, turn work. [7 STS]
R2: Decrease for 2 HDC STS to have 5 STS for this row, turn work. [5 STS]
R2: Decrease for 2 HDC STS to have 2 STS for this row, turn work. [3 STS]
R2: Decrease for 1 HDC ST entirely leaving only ST left as the point of the crown. Cut off last strand to tie off and eventually sew in.
Next, you will insert your hook into the following ST, after the first point just created.
You will create this sequence for the entire base of the crown creating the points for the crown.

After completing all 6 points for the crown. Sew in all of the strands. Reinsert your hook to single crochet for one round solely for the finishing look. At end of the rounds, SS to complete work. 


ashlee elle.

Thursday, June 11, 2015

HandMade: The Lively Co-ord Crochet Skirt and Crochet Top.

 Hello there! Hope you're having a lovely week! This design was brought about for my recent new love, coordinating outfits. I love the notion of having your outfit all sorted together, matching so perfectly. To be honest, I'm a huge mix and matcher (which will be another collection in the near future!) so creating a piece that go hand in hand with each other, would be out of the question. Though honestly, I think it's an awesome collaboration of two pieces that were simply meant to be.

This crochet pattern is an easy to follow, make it your own, longer or shorter design that you can create to your own personal style. Which is what my patterns are all about! I love this concept and I  am entirely not even thinking about stopping here! 


Pattern Details:
The yarn I used: 1 Jumbo Skein in white [Lion Brand Impeccable Yarn]
The hook I used: H/8-5.00MM


Get The Lively Co-Ord Crochet Set Pattern at:

x, ashlee elle.

Tuesday, February 24, 2015

DIY: Cuffed Crochet Boot Cuffs// Free Pattern!!

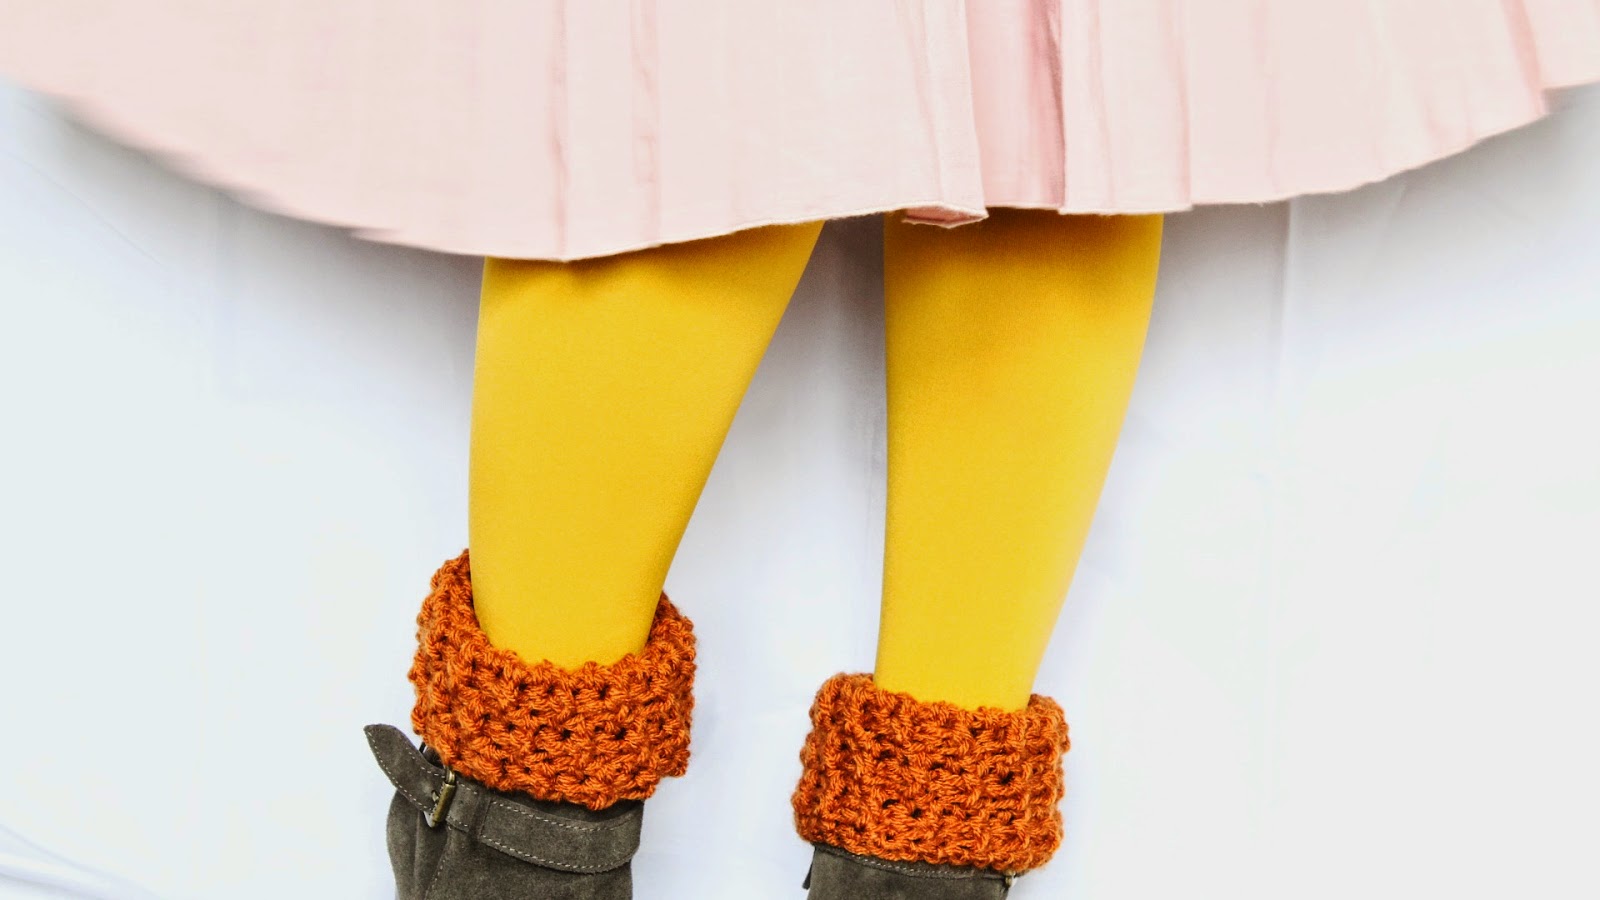
Hello there! Happy Tuesday to you! Since the days are chilling on the freezing side, I wanted to make a pair of cute and warm crochet boot cuffs to wear! Using my scrap bin, I used the remaining bit of this lion brand skein to create these super comfy boot cuffs.

Ingredients:    

Crochet Hook>>K101/2-6.50MM
Scissors
Scrap Yarn used>>Less than 1 Skein of Lion Brand Yarn (Burnt Orange)

Stitch guide
SC= single crochet    

HDC= half double crochet
SS= slip stitch
ST(S)= stitch(es)
CH= chain
YO= yarn over 


*This pattern emulates the cable stitch look!

Step 1
CH 31
At the end of the row, SS to connect the last ST to the first ST.
You will be working in rounds for this pattern.
 
Row 1: HDC the entire row, into all of the STS. At the end of the row, SS to connect the last ST to the first ST.
Row 2: YO, insert your hook into the back of the previous ST from Row, YO, pull the strands with the hook through and CH 1. For the next ST, you will YO again, but insert your hook into the Front of the ST, YO pull yarn through and CH 1. *Repeat this method until the end of the Row, SS to connect the last ST to the first ST. 

Row 3: HDC the entire row, into all of the STS. At the end of the row, SS to connect the last ST to the first ST.
Row 4: YO, insert your hook into the back of the previous ST from Row, YO, pull the strands with the hook through and CH 1. For the next ST, you will YO again, but insert your hook into the Front of the ST, YO pull yarn through and CH 1. *Repeat this method until the end of the Row, SS to connect the last ST to the first ST. 
Row 5: HDC the entire row, into all of the STS. At the end of the row, SS to connect the last ST to the first ST.
Row 6: YO, insert your hook into the back of the previous ST from Row, YO, pull the strands with the hook through and CH 1. For the next ST, you will YO again, but insert your hook into the Front of the ST, YO pull yarn through and CH 1. *Repeat this method until the end of the Row, SS to connect the last ST to the first ST. 
Row 7: HDC the entire row, into all of the STS. At the end of the row, SS to connect the last ST to the first ST.
Row 8: YO, insert your hook into the back of the previous ST from Row, YO, pull the strands with the hook through and CH 1. For the next ST, you will YO again, but insert your hook into the Front of the ST, YO pull yarn through and CH 1. *Repeat this method until the end of the Row, SS to connect the last ST to the first ST. 
Row 9: HDC the entire row, into all of the STS. At the end of the row, SS to connect the last ST to the first ST.
Row 10: YO, insert your hook into the back of the previous ST from Row, YO, pull the strands with the hook through and CH 1. For the next ST, you will YO again, but insert your hook into the Front of the ST, YO pull yarn through and CH 1. *Repeat this method until the end of the Row, SS to connect the last ST to the first ST. 
Row 11: HDC the entire row, into all of the STS. At the end of the row, SS to connect the last ST to the first ST.
Row 12: SC the entire row, into all of the STS. At the end of the row, SS to connect the last ST, cut yarn off to sew in the edges.
You will be repeating this pattern twice to create a pair of boot cuffs!
ashlee elle.

Tuesday, January 27, 2015

DIY: How To Crochet This Chunky Cuffed Scarf.

Hello there! Happy Tuesday to you! This multicolored cuffed crocheted scarf, utilizing two different yarn skeins! So I've made a free pattern to show how you can create your own version of this scarf!
Ingredients: 
Crochet Hook>> H8-5.00MM
Scissors
Yarn used>>1 Skein of (Hot Pink) and 1 Skein (Grape) of Lion Brand Homespun
Yarn sewing needle


Stitch guide
SC= single crochet

HDC= half double crochet
DC= double crochet
SS= slip stitch
ST(S)= Stitch(es)
CH= chain

Insert both yarn slip knots into the crochet hook (Like the photo above)

CH 81 with both bits (skeins) of yarn on the hook
 
*HDC the entire first Row(which is Row 1)
Row 2: HDC the entire Row, turn work
Row 3: DC the entire Row, turn work
(Alternating between 2 Rows of HDC and 1 Row of DC)
Until you reach Row 50.
SS, cut and weave in the ends.
 
For the finishing look.  
Insert the pink yarn and  SC around the finished crocheted piece. 
SS, cut and weave in the ends.

Next, fold the finished piece, horizontally, sew the edges  of both of the sides separately. 
SS, cut and weave in the ends.
 
Then sew the two sides together, cut the yarn and sew in the remaining bits.
ashlee elle.

Thursday, October 23, 2014

HandMade: The Pumpkin Pie Crochet Shorts.

Hello there & Happy Handmade Thursdays to ya! Still feeling a bit under the weather, but I couldn't wait to show this new crochet short design I have recently made. Wanting to utilize an exposed zipper somewhere in this design, it suited the design in the end, just the way I imagined!

I feel as if crocheting shorts, for me personally, has been an evolution, I try to create better ones each time, it's basically practice. I entirely feel that there's always room to learn and experiment! I used a simple technique for creating these shorts, I wanted to keep the stitch as simplistic as possible as well as the pattern. Especially seeing that I would want to wear them all throughout the Autumn season. I didn't feel it needed anything going on with it, sometimes basic is okay! The exposed zipper on the side, offers that little bit of snug and security for this design which I could not decide on where I truly wanted to place it, I opted for the side because it adds a little detail to such a simple design.

On the real, to be entirely honest, these shorts are ridiculously comfortable! After shooting the photographs for them, I just stayed in them all day long. Truly one of my favorite designs yet, I can't wait to put the pattern up!

Crochet Pattern for my first pair of Crochet Shorts>> HERE.

The yarn I used was Vanna's Choice (Rust)
The hook I used was a J/10-6.00MM
The Pumpkin Pie Crochet Shorts pattern is entirely experimental, made from my own pattern! Planning to place the pattern for purchase on my Pattern Shoppe! It's in queue.


Thursday, October 2, 2014

HandMade: The Stay Crochet Sweater.

Hello there & Happy Thursday! I have been wanting to buy and use this yarn for ages. Every single time that I would go to Michael's I would just stare at it, entirely thrown off by the price. (11.99) though with a coupon, it really isn't a big deal, but I suppose if I was going to purchase it, I needed to have a game plan in mind. 

I wanted to create a little bit more than a cropped top kind of sweater with structured sleeves. It doesn't get crazy cold here in Texas, so I opted to create a top more fitting for our Autumn seasons. Pairing it with a pair of slight high waisted denim and it's definitely a lovely combination.

I must say, working with this yarn was a bit of a dream and I entirely want to go buy more and more for all the other ideas I have stored up! The yarn is very comfortable and doesn't hold any itchy factor along with it. I'm entirely up for creating more as well as sharing the pattern!

Project Details:
The yarn I used was Lion Brand Yarn (Fishermen's Wool)
The hook I used was a H8-5.00MM
The Stay Crochet Sweater pattern is entirely experimental, made from my own pattern! Planning to place the pattern for purchase on my Pattern Shoppe!


Hope your projects are coming along quite nicely!
ashlee elle.

Tuesday, March 11, 2014

DIY: How To Crochet A Fabric Bracelet.

Happy Tuesday to ya! I've been itching to gear some of my crochet items towards Spring. I truly wanted to try my hand on crocheting fabric yarn, either made from t-shirt scraps or even store bought (which is the method I chose) to create something out of it. Hopefully, I will attempt creating my own fabric yarn, I've never tried it before and I'd love to see how it would come out.

I'm a huge fan of accessories and wanted to implement that into the crochet world. So here is a very simple and very easy tutorial on how to crochet a fabric bracelet.
The Ingredients
>> scissors
>> you can create your own or try Lion Brand's Fettuccine fabric yarn
>> crochet hook  J/10-6.00MM

Crochet techniques with abbreviations
SC= single crochet
HDC= half double crochet
SS= slip stitch 
CH= chain
Left//
You will start a CH of 10 (depends on your wrist size too)

Right//
You will connect the starting ST with the last ST

Left//
Row 1: HDC the entire Row. Connecting the last ST to the first ST.

Right//
Row 2: SC the entire Row. Connecting the last ST to the first ST. 
SS, and cut to weave the ends in. 

//ashlee elle//