Showing posts with label how to crochet. Show all posts

Tuesday, December 11, 2018

Tutorial Tuesday: Crochet Bow Finger-Free Cuffs // Free Crochet Pattern!

Hello there and Happy Tuesday to you!  So I wanted to share a super quick and easy pattern on how to keep your fingers warm while you're crafting away! I absolutely love finger-less gloves especially during the colder seasons so I modified a past pattern and created a swift version to share! Enjoy!


The Ingredients
Less than 1 Ball of Lion Brand's Vanna's Choice in Scarlet // Medium 4 // 100% acrylic
Craft Scissors
Crochet Hook: H/8 5.00 MM
Tapestry Sewing Needle
 Abbreviations
sc=single crochet
hdc=half double crochet
[number]tch[s]=turning chain[s]
sts=stitches

The Pattern
I measured the circumference of my head/hair, my measurements will be a bit bigger because of my protective braids, though I would recommend sizing your own and crocheting to that specific sizing. [Note: You can always return back to the beginning to create a snug fit, with one round of single crochet.]
First, I chained for 21 (depending on your wrist size you might want to modify.
RND1: HDC the entire round, into all of the STS, at end of the round, SS to connect work and turning chain accordingly.
RND2: SC the entire round, into all of the STS, at end of the round, SS to connect work and turning chain accordingly.
RND3: HDC the entire round, into all of the STS, at end of the round, SS to connect work and turning chain accordingly.
RND4: HDC the entire round, into all of the STS, at end of the round, SS to connect work and turning chain accordingly.
RND5: SC the entire round, into all of the STS, at end of the round, SS to connect work and turning chain accordingly.
RND6: HDC the entire round, into all of the STS, at end of the round, SS to connect work and turning chain accordingly.

*LEFT HAND
You will SC only for 5 STS for the start of the row. To begin the thumb hole, you will CH 5.
After CH 5, skip 5 STS and SC into the remaining STS.
*****************************
*RND7: SC the entire row, into all of the STS, at end of the round, SS to connect work and turning chain accordingly.


*RIGHT HAND
You will HDC only for 15 STS for the start of the row. To begin the thumb hole, you will CH 5.
After CH 5, skip 5 STS and SC into the final ST.
*****************************
*RND7: SC the entire row, into all of the STS, at end of the round, SS to connect work and turning chain accordingly.

Continuing on.....
BOTH
RND8: HDC the entire row, into all of the STS, at end of the round, SS to connect work and turning chain accordingly.
RND9: SC the entire row, into all of the STS, at end of the round, SS to connect work and turning chain accordingly.


CREATING THE BOW
CH for 11

RND1: HDC the entire row, into all of the STS, at end of the row turn work to continue.
RND2: SC the entire row, into all of the STS, at end of the row turn work to continue.
RND3: HDC the entire row, into all of the STS, at end of the row turn work to continue.
RND4: SC the entire row, into all of the STS, at end of the row turn work to continue.
RND5: HDC the entire row, into all of the STS, at end of the row turn work to continue.
RND6: SC the entire row, into all of the STS, at end of the row, SS to complete work.

You will cut a piece of yarn, not too long. (I didn't really estimate the length!)
Threading the yarn, into the sewing yarn needle, you will scrunch the center of the bow. (Like the photo above!)

After the bow is tied and scrunched, you will want to stitch it by sewing the bow to the wrist cuff. I sewed the middle of the bow to the front of the wrist cuff. (You will have to try the wrist cuff on, to find the exact position! :)) Now it is complete to start the tutorial over again to create the other half!


ashlee elle.


Tuesday, May 10, 2016

DIY // Summer 70's Crochet Headband. Free Crochet Pattern!

Hello there! I hope you all had a lovely weekend! Here is a completely free and 70's inspired crochet Summer headband! Which only requires one skein, super easy and a fun accessory to wear! 

Also, be sure to check out, DREAM CROCHET ON YOUTUBE for future free crochet videos!


Ingredients:     Crochet Hook>> J/10 6.00MM  Craft Scissors   Yarn Sewing Needle Yarn used>>1 Skein  Sugar N Cream Medium 4
  Stitch guide:    HDC= half double crochet// SC=single crochet// DC=double crochet// SS= slip stitch //ST(S)= stitch(es)// CH= chain R[number]= Row

STEP ONE

CH 101 [42 inches]
R1: HDC into every stitch for the entire row, when complete, turn work and CH 1.
R2-R3: HDC into the first two STS, CH 1, Skip 1 ST, and HDC into the following 2 STS...[You will repeat this method for the entire Row..when reaching the end, continue an extra HDC to complete the Row and SS.]
Measure about 13 inches in and insert your hook into the 33rd ST.
R4-R5: HDC into the first two STS, CH 1, Skip 1 ST, and HDC into the following 2 STS...[You will repeat this method for the entire Row..when reaching the end, leave the remaining 33 STS open and turn work. When you hit Row 5, SS to complete work.]
R6: Re-insert your hook into the very beginning, for all 100 STS to create the finished look. SC into every stitch for the entire row, when complete, SS to end final work.


tag your designs #dreamcrochetdesigns  
ashlee elle.
 

Tuesday, January 26, 2016

DIY // How To Crochet A Shawl/Blanket/Throw.

Hello there! Hope your weekend was a safe, nice and warm one! Speaking of warm, this tutorial is absolutely perfect for home as well as on the go! I love two in one creations where the project can be utilized in various ways. This blanket/throw is a cozy piece that can very easily convert into a shawl for those Winter nights!
Ingredients:    

Crochet Hook>> N 9.00MM  Craft Scissors   Yarn Sewing Needle
  Yarn used>>5 Skein// Country Loom

  Super Bulky 6


  Stitch guide:    HDC= half double crochet// SC=single crochet// DC=double crochet// SS= slip stitch //ST(S)= stitch(es)// CH= chain RND[number]= Round


Cable Stitch Technique: FPHDC // BPHDC 

CH 61
R1: SC into all of the STS for the Row, turn work to continue.

R2: HDC into all of the STS for the Row, turn work to continue.
R3: HDC into all of the STS for the Row, turn work to continue.
R4: Alternate between FPHDC and BPHDC [respectively] turn to continue work after last ST.
R5: SC into all of the STS for the Row, turn work to continue.
R6: HDC into all of the STS for the Row, turn work to continue.
R7: SC into all of the STS for the Row, turn work to continue.
R8: HDC into all of the STS for the Row, turn work to continue.
R9: SC into all of the STS for the Row, turn work to continue.
R10: HDC into all of the STS for the Row, turn work to continue.
R11: HDC into all of the STS for the Row, turn work to continue.
R12: Alternate between FPHDC and BPHDC [respectively] turn to continue work after last ST.
R13: SC into all of the STS for the Row, turn work to continue.
R14: HDC into all of the STS for the Row, turn work to continue.
R15: SC into all of the STS for the Row, turn work to continue.
R16: HDC into all of the STS for the Row, turn work to continue.
R17: HDC into all of the STS for the Row, turn work to continue.
R18: Alternate between FPHDC and BPHDC [respectively] turn to continue work after last ST.
R19: SC into all of the STS for All of the Rows, turn work to continue.
R20: HDC into all of the STS for the Row, turn work to continue.
R21: SC into all of the STS for for the Row, turn work to continue.
R22: HDC into all of the STS for the Row, turn work to continue.
R23: HDC into all of the STS for the Row, turn work to continue.
R24: Alternate between FPHDC and BPHDC [respectively] turn to continue work after last ST.
R25: SC into all of the STS for the Row, SS to complete work
Insert hook unto the side of the completed crocheted piece.
RND1: DC into the first ST, CH 1, DC again in the same ST [solely for the corners of the crocheted piece [4 times] for the remaining round, DC into all of the STS only once.] SS to continue work.)
RND2: TRC into the first ST, CH 1, TRC again in the same ST [solely for the corners of the crocheted piece [4 times] for the remaining round, TRC, CH 1, [Skip 1 ST] TRC into the following ST...(Repeat method throughout the round, at end of round SS to continue work.)

RND3: TRC into the first ST, CH 1, TRC again in the same ST [solely for the corners of the crocheted piece [4 times] for the remaining round, TRC, CH 1, [Skip 1 ST] TRC into the following ST...(Repeat method throughout the round, at end of round SS to complete work.)

*Tag your creations with #thedreamcrochet

ashlee elle.

Tuesday, January 12, 2016

DIY // Free Crochet Pattern // Chunky Bow Infinity Scarf!

Hello there! Hope your weekend was a safe, nice and warm one! Speaking of warm, this tutorial is all about keeping you super toasty. I'm pretty obsessed with scarves, especially infinity scarves which I like to experiment with making each one different in its own way. So here is a free crochet pattern on how to crochet this bow infinity scarf utilizing two colors and a new stitch technique.
Ingredients:    

Crochet Hook>> N 9.00MM  Craft Scissors   Yarn Sewing Needle
  Yarn used>>1 Skein [Main Color] [Both Yarns "Cozy Wool" from Loops & Threads]  
Half a Skein [Secondary Color] Super Bulky 6


  Stitch guide:    HDC= half double crochet// SC=single crochet// DC=double crochet// SS= slip stitch //ST(S)= stitch(es)// CH= chain RND[number]= Round
CH 13 [Using Main Color]  
R1: HDC into all of the STS for the entire Row, at the very end of the Row, turn work. R2: SC into the BACK LOOP for the entire Row, at the very end of the Row, turn work.
R3: HDC into all of the STS for the entire Row, at the very end of the Row, turn work. R4: SC into the BACK LOOP for the entire Row, at the very end of the Row, turn work.
R5-R36: HDC into all of the STS for the entire Row, at the very end of the Row, turn work.

Switch Colors [Secondary Color]
*Note: You will switching colors with the Main Color.
 R1: HDC into all of the STS for the entire Row, at the very end of the Row, turn work.
R2:
SC into the BACK LOOP for the entire Row, at the very end of the Row, turn work.

R3: HDC into all of the STS for the entire Row, at the very end of the Row, turn work.  

R4: {using main color] SC into the BACK LOOP for the entire Row, at the very end of the Row, turn work.
 R5: HDC into all of the STS for the entire Row, at the very end of the Row, turn work.
R6:
SC into the BACK LOOP for the entire Row, at the very end of the Row, turn work.

R7: HDC into all of the STS for the entire Row, at the very end of the Row, turn work. R8: {using main color] SC into the BACK LOOP for the entire Row, at the very end of the Row, SS to complete work.

Sewing Technique
Using your yarn sewing needle and a strand of the main color, Sew the ends of the scarf together through the seams to connect.
Finishing Technique
Next, using the coordinating color, insert hook unto the side of the scarf for the Finishing Look, SC around the entire finished piece. Once you have completed the sole Row of SC, SS at the end to complete final work.
Next, with a strand of yarn [an inch or so] from the Secondary Color, cinch the middle of the Secondary Color Section to create a "bow" effect. Wrap the strand around, tying it securely in place with a knot into the back of the finished piece.

Tag your creations with #thedreamcrochet

ashlee elle.

Tuesday, November 17, 2015

DIY: The Crochet Newsboy Inspired Hat.

Hello there and Happy Tuesday to ya! I've been quite inspired to create this newsboy inspired crochet hat. The hat was inspired by the show Scream Queens, one of the main characters wears them and I couldn't help myself, I had to make a similar one!
Crochet Hook>> J/10 6.00MM //  Craft Scissors  // Yarn Sewing Needle // 


  Yarn used>>Less Than Half a Skein [Red Heart Super Saver]
  Stitch guide:    HDC= half double crochet// SC=single crochet// DC=double crochet// SS= slip stitch //ST(S)= stitch(es)// CH= chain R[row]= Round
Note: You will be working in rounds!
STEP 1// To start the hat.
 CH 3
Connect the last ST, to the very first ST. RND1: HDC into the middle of the connected CH 6 times, at the end of the round, SS to continue work.
RND2: HDC into every ST, two times, at the end of the round, SS to continue work. Total of 12 STS.
RND3: HDC into the first ST, once, into the following 2nd ST, HDC two times...[*Repeat method until the very end of the Round, at the end of the round, SS to continue work.]
RND4: HDC into the first TWO STS, once, into the following 2nd ST, HDC two times...[*Repeat method until the very end of the Round, at the end of the round, SS to continue work.]
RND5: HDC into the first THREE ST, once, into the following 2nd ST, HDC two times...[*Repeat method until the very end of the Round, at the end of the round, SS to continue work.]

RND6: HDC into the first TWO STS, once, CH 1, Skip 1 ST, HDC into the following TWO STS only once.. [*Repeat method until the very end of the Round, at the end of the round, SS to continue work.]
RND7:  DC into the first TWO STS, once, CH 1, Skip 1 ST, HDC into the following TWO STS only once.. [*Repeat method until the very end of the Round, at the end of the round, SS to continue work.]
RND8:  HDC into the first TWO STS, once, CH 1, Skip 1 ST, HDC into the following TWO STS only once.. [*Repeat method until the very end of the Round, at the end of the round, SS to continue work.]
RND9:  DC into the first TWO STS, once, CH 1, Skip 1 ST, HDC into the following TWO STS only once.. [*Repeat method until the very end of the Round, at the end of the round, SS to continue work.]
RND10: HDC into all of the STS for the entire Round, SS to continue work.
RND11-RND13: SC into all of the STS for the entire Round, SS to continue work. At the final Round, [Round 13] SS to complete final work.
STEP 2// To create the brim of the hat.
Next, lay the hat flat and insert your hook at the edge of the flattened hat. You will SC into 20 STS.
R1-R7: Skip the first ST, and SC into all of the STS until you hit the 2nd to last ST, skip the 2nd to last ST to SC into the final ST, turn work to continue method. Decreasing after every Row, you will conclude work at 3 STS. At the final Row, SS to complete work.

Finishing Technique
Insert hook into the back of the hat, to SC around the finished piece. SS to complete final work.

ashlee elle.

Tuesday, November 10, 2015

DIY: Super Easy Autumn Crochet Scarf // Free Crochet Pattern

Hello there & Happy Tuesday to you! This project is an tribute to not letting those scrap yarn skeins go to waste! Truly being a huge fan of Red Hearts Unforgettable Yarn and I had previously created a crochet dress utilizing it for the Fall Collection, but I really wanted to utilize the remaining yarn so here is the project!
Crochet Hook>> H/ 5.00MM //  Craft Scissors  // Yarn Sewing Needle // 

  Yarn used>>Less Than Half a Skein [Red Heart Unforgettable Boutique]

  Stitch guide:    HDC= half double crochet// SC=single crochet// DC=double crochet// SS= slip stitch //ST(S)= stitch(es)// CH= chain R[row]= Round
CH 29
R1: SC the entire Row, into all of the STS, at the end of the Row, turn work when complete.
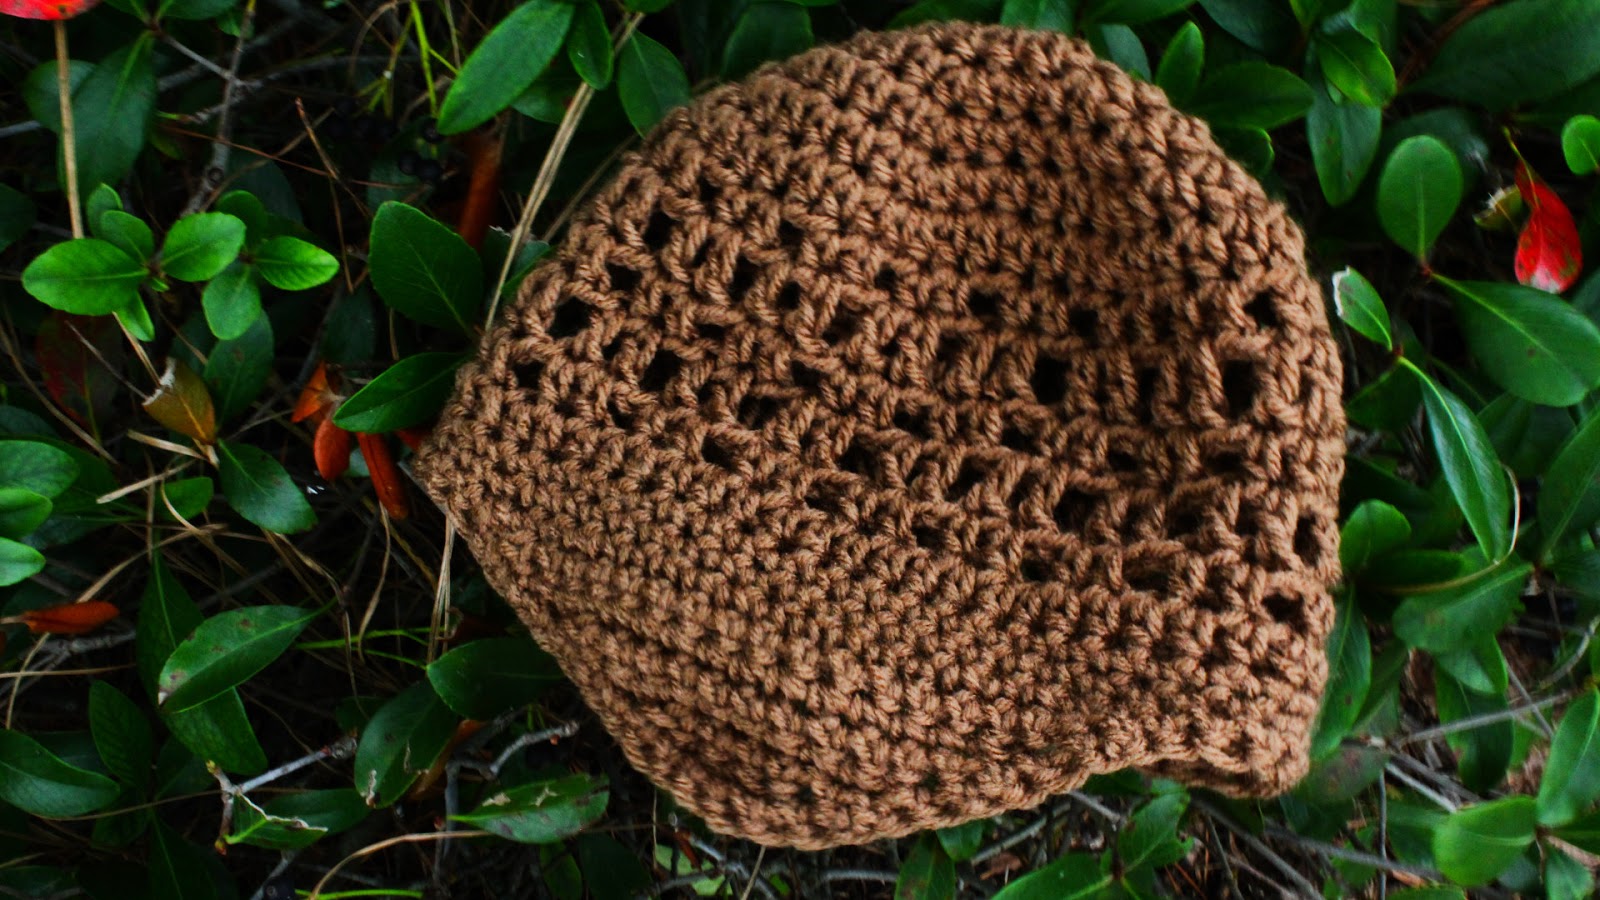
R2-R38:  DC into the first ST, DC into the following ST, CH 1, Skip 1 ST, DC into the following ST, CH 1, DC into the SAME ST again, Skip 2 STS, DC into the following ST, CH 1, DC into the SAME ST again, Skip 2 STS, DC into the next ST, CH 1, DC into the following ST, CH 1, DC into the SAME ST again, Skip 2 STS, DC into the next ST, CH 1, DC into the following ST, CH 1, DC into the SAME ST again, Skip 2 STS, DC into the final ST...[*Repeat method for ALL rows, at the end of each Row, turn work when complete.]
R39: SC the entire Row, into all of the STS, at the end of the Row,SS to complete work.
ashlee elle.