Thursday, February 26, 2015

HandMade: The Crochet Timber Sweater Dress.

Hello there! Happy Thursday to you! I've had this sweater dress design in my head for a bit, it was created in my mind where I wanted a lengthy sweater dress to wear with leggings. I played around a bit with the technique and stitches I wanted to utilize throughout this pattern. Meaning I wanted a bit of "breath-ability" and warmth all at the same time, simply because I didn't want the dress to be too hot and uncomfortable.

What I love about this sweater dress, is being able to layer it and stay super comfy while still keeping the style factor the forefront. I can just throw a faux leather motorcycle jacket over it and a pair of boots and I'm out the door! My main objective when creating any piece that I want to ensure that is absolutely comfortable and entirely practical for everyday wear.

The Crochet Timber Sweater Dress Pattern Available Here

ashlee elle.

Tuesday, February 24, 2015

DIY: Cuffed Crochet Boot Cuffs// Free Pattern!!

Hello there! Happy Tuesday to you! Since the days are chilling on the freezing side, I wanted to make a pair of cute and warm crochet boot cuffs to wear! Using my scrap bin, I used the remaining bit of this lion brand skein to create these super comfy boot cuffs.

Ingredients:    

Crochet Hook>>K101/2-6.50MM
Scissors
Scrap Yarn used>>Less than 1 Skein of Lion Brand Yarn (Burnt Orange)

Stitch guide
SC= single crochet    

HDC= half double crochet
SS= slip stitch
ST(S)= stitch(es)
CH= chain
YO= yarn over 


*This pattern emulates the cable stitch look!

Step 1
CH 31
At the end of the row, SS to connect the last ST to the first ST.
You will be working in rounds for this pattern.
 
Row 1: HDC the entire row, into all of the STS. At the end of the row, SS to connect the last ST to the first ST.
Row 2: YO, insert your hook into the back of the previous ST from Row, YO, pull the strands with the hook through and CH 1. For the next ST, you will YO again, but insert your hook into the Front of the ST, YO pull yarn through and CH 1. *Repeat this method until the end of the Row, SS to connect the last ST to the first ST. 

Row 3: HDC the entire row, into all of the STS. At the end of the row, SS to connect the last ST to the first ST.
Row 4: YO, insert your hook into the back of the previous ST from Row, YO, pull the strands with the hook through and CH 1. For the next ST, you will YO again, but insert your hook into the Front of the ST, YO pull yarn through and CH 1. *Repeat this method until the end of the Row, SS to connect the last ST to the first ST. 
Row 5: HDC the entire row, into all of the STS. At the end of the row, SS to connect the last ST to the first ST.
Row 6: YO, insert your hook into the back of the previous ST from Row, YO, pull the strands with the hook through and CH 1. For the next ST, you will YO again, but insert your hook into the Front of the ST, YO pull yarn through and CH 1. *Repeat this method until the end of the Row, SS to connect the last ST to the first ST. 
Row 7: HDC the entire row, into all of the STS. At the end of the row, SS to connect the last ST to the first ST.
Row 8: YO, insert your hook into the back of the previous ST from Row, YO, pull the strands with the hook through and CH 1. For the next ST, you will YO again, but insert your hook into the Front of the ST, YO pull yarn through and CH 1. *Repeat this method until the end of the Row, SS to connect the last ST to the first ST. 
Row 9: HDC the entire row, into all of the STS. At the end of the row, SS to connect the last ST to the first ST.
Row 10: YO, insert your hook into the back of the previous ST from Row, YO, pull the strands with the hook through and CH 1. For the next ST, you will YO again, but insert your hook into the Front of the ST, YO pull yarn through and CH 1. *Repeat this method until the end of the Row, SS to connect the last ST to the first ST. 
Row 11: HDC the entire row, into all of the STS. At the end of the row, SS to connect the last ST to the first ST.
Row 12: SC the entire row, into all of the STS. At the end of the row, SS to connect the last ST, cut yarn off to sew in the edges.
You will be repeating this pattern twice to create a pair of boot cuffs!
ashlee elle.

Thursday, February 19, 2015

HandMade: The Deep Blue Sea Crochet Cardigan.

Hello there! Happy Thursday to you! I've been wanting to create a cardigan all year long, especially a chunky one and I have to say this one of my favorite pieces to wear. For the design, I had a few little details that I omitted, like adding buttons or pockets, though I opted to keep it a simple design.

What I love about this crochet cardigan, is that it is incredibly warm! I recall trying it on once it was complete and I didn't want to take it off at all. It has the comfy sweater vibe that I am extremely all about right now, especially in these lovely chilly weather changes. This cardigan is easy to make and perfect to wear either during a cold winter day or to bring to a freezing movie theater night!
The The Deep Blue Sea Crochet Cardigan Pattern Available Here
ashlee elle.

Tuesday, February 17, 2015

DIY: How To Make This Crocheted Lamp Cozy// Free Pattern!

Hello there & Happy Tuesday to you! This lamp shade has been sitting on my desk, entirely bare and entirely boring that I decided it needed to spruced up! This DIY was put to very good use with helping to create a bright and colorful environment for my desk space.  So I've decided to still use my challenge in only utilizing yarn from my used/scrap bin of yarn to create a lamp shade cozy!
Ingredients:    Crochet Hook>>K101/2-6.50MM
Scissors
Scrap Yarn used>>1 Skein of (hot pink), 1 Skein of (turquoise),
1 Skein of (canary yellow) of Red Heart Super Saver Yarn and 1 Skein (off white) of

Stitch guide
SC= single crochet  
HDC= half double crochet
DC= double crochet
SS= slip stitch
ST(S)= stitch(es)
CH= chain 

YO= yarn over 
Step 1
Starting with the hot pink yarn.
CH 80
Row 1: HDC the entire row, in all of the STS. At the end of the Row. SS, cut of yarn and sew in the edges.
Row 2: Insert off white yarn, CH 3, skip the first ST, DC into the following ST, skip the following ST, DC into the following. *Repeat this method until the end of the Row.  SS, cut of yarn and sew in the edges.
Row 3: Insert turquoise yarn, into the first white ST, CH 3, into the opening of the white yarn, YO two times insert your hook into the space, pull through the yarn and CH 1. You will repeat this method until the end of the row.
 Row 4: Insert canary yellow yarn, into the first white ST, CH 3, into the opening of the white yarn, YO two times insert your hook into the space, pull through the yarn and CH 1. You will repeat this method until the end of the row.
Row 5: Insert hot pink yarn, into the first white ST, CH 3, into the opening of the white yarn, YO two times insert your hook into the space, pull through the yarn and CH 1. You will repeat this method until the end of the row.
Row 6: Insert white yarn, into the first white ST, CH 3, into the opening of the white yarn, YO two times insert your hook into the space, pull through the yarn and CH 1. You will repeat this method until the end of the row. 
Row 7: SC the entire row, SS, cut off the yarn to sew in the edges.

Note: For this lamp I had to create this piece two times because I wanted to keep the middle detail of this specific lamp. If you want to create a full crocheted lamp shade, please continue past Row 6 alternating colors!
Step 2
I decided to sew the crocheted pieces directly to the lamp shade, for a snug fit, without applying glue or any other holding.
ashlee elle.

Thursday, February 12, 2015

HandMade: The L.O.V.E Crochet Dress// Pattern Available!

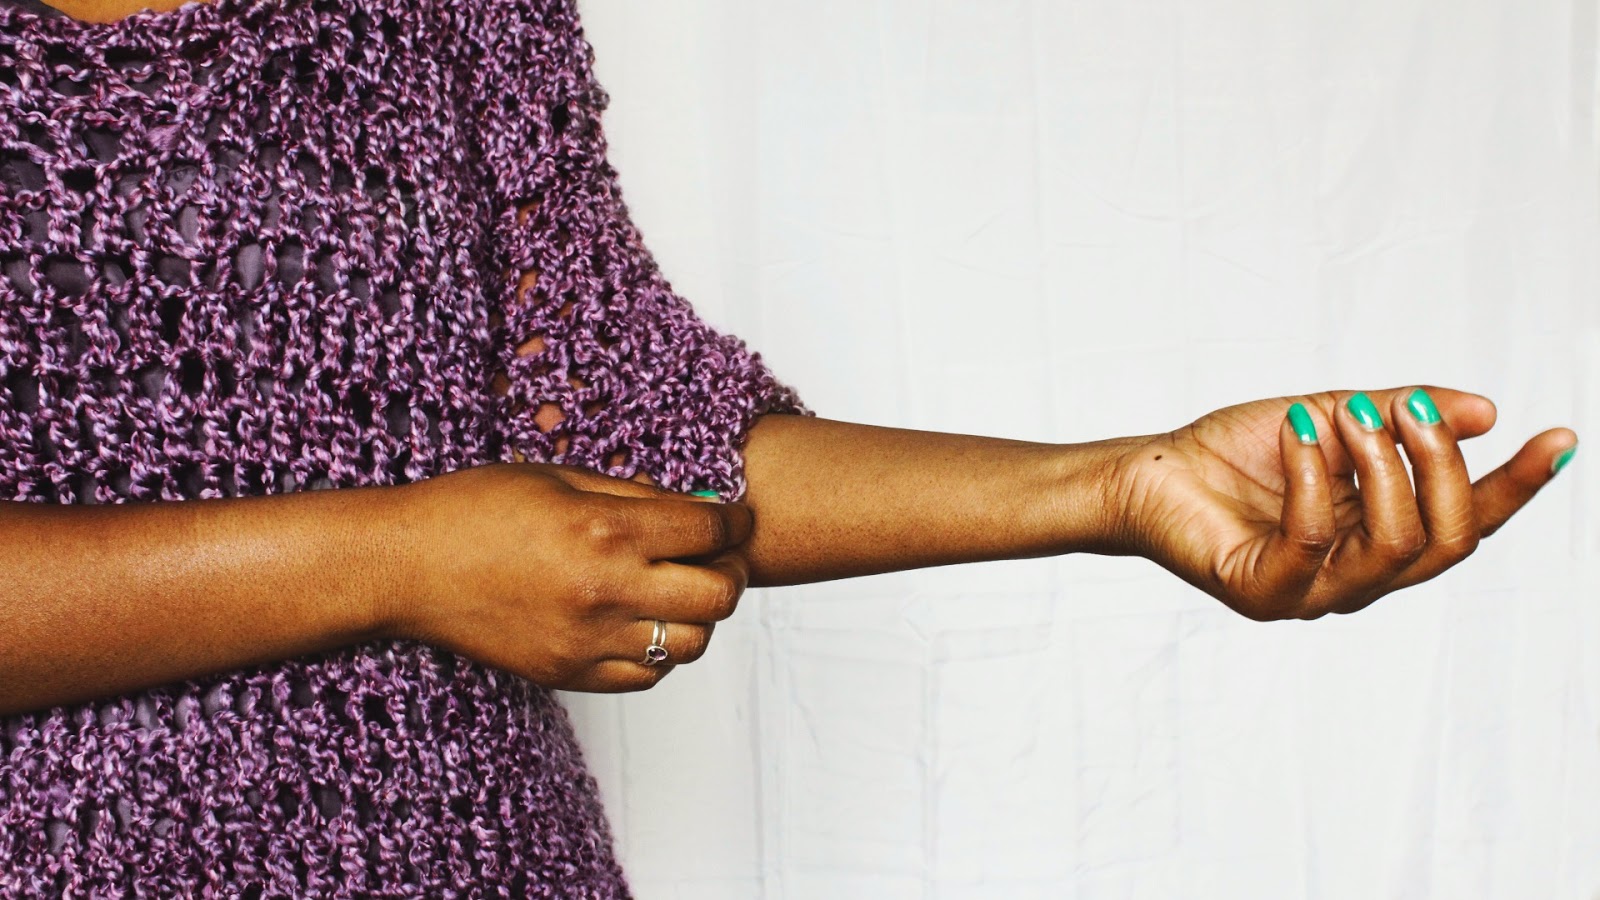
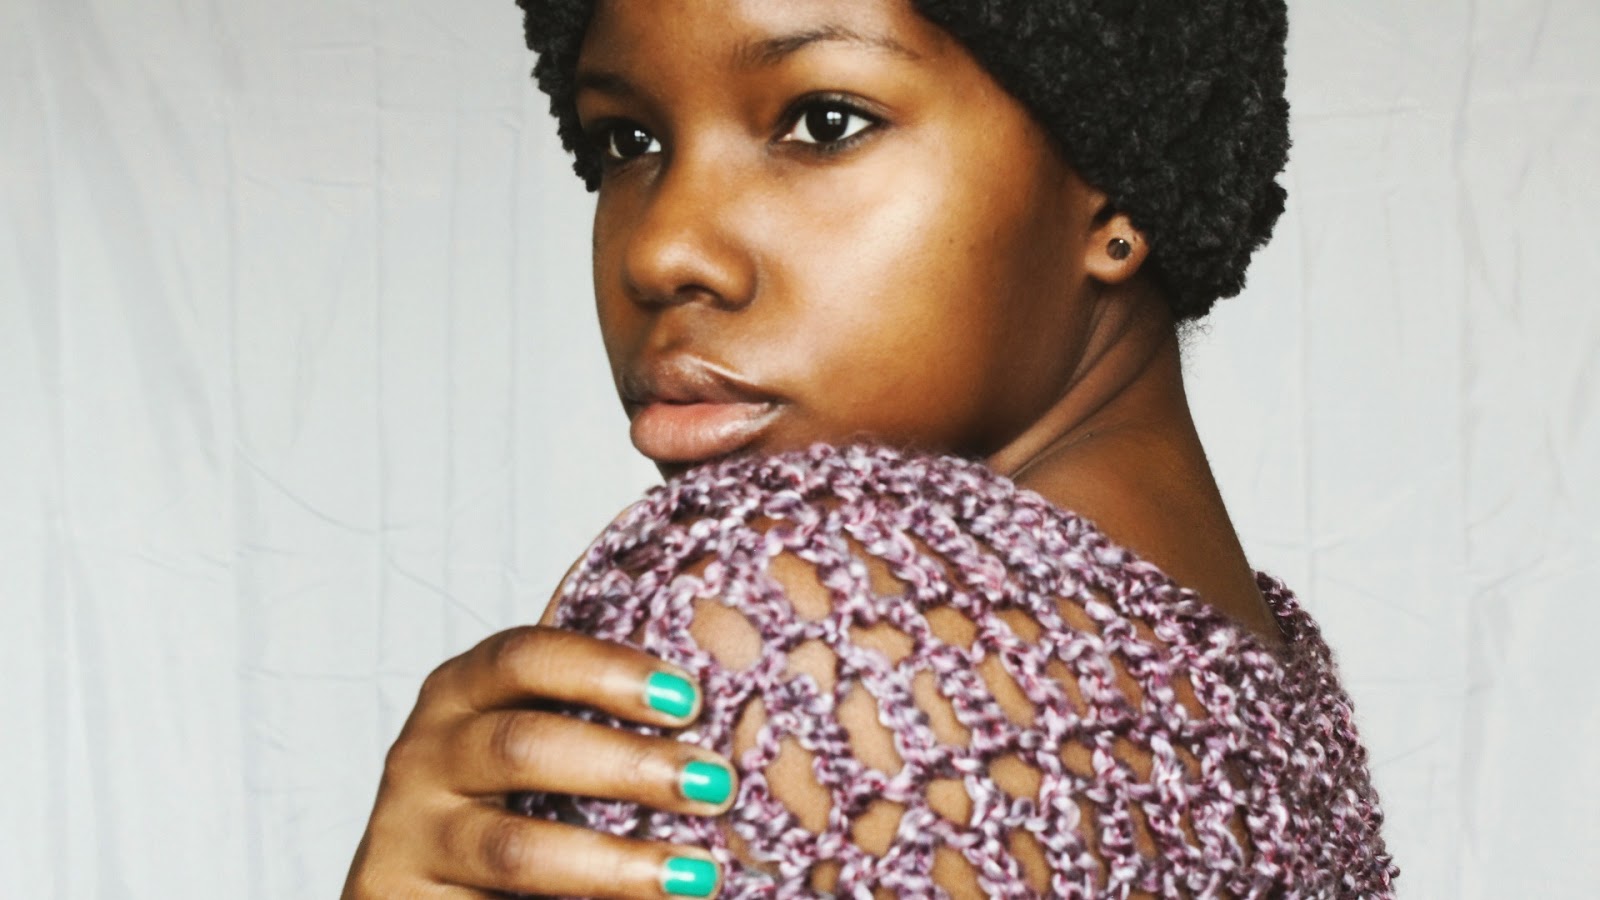
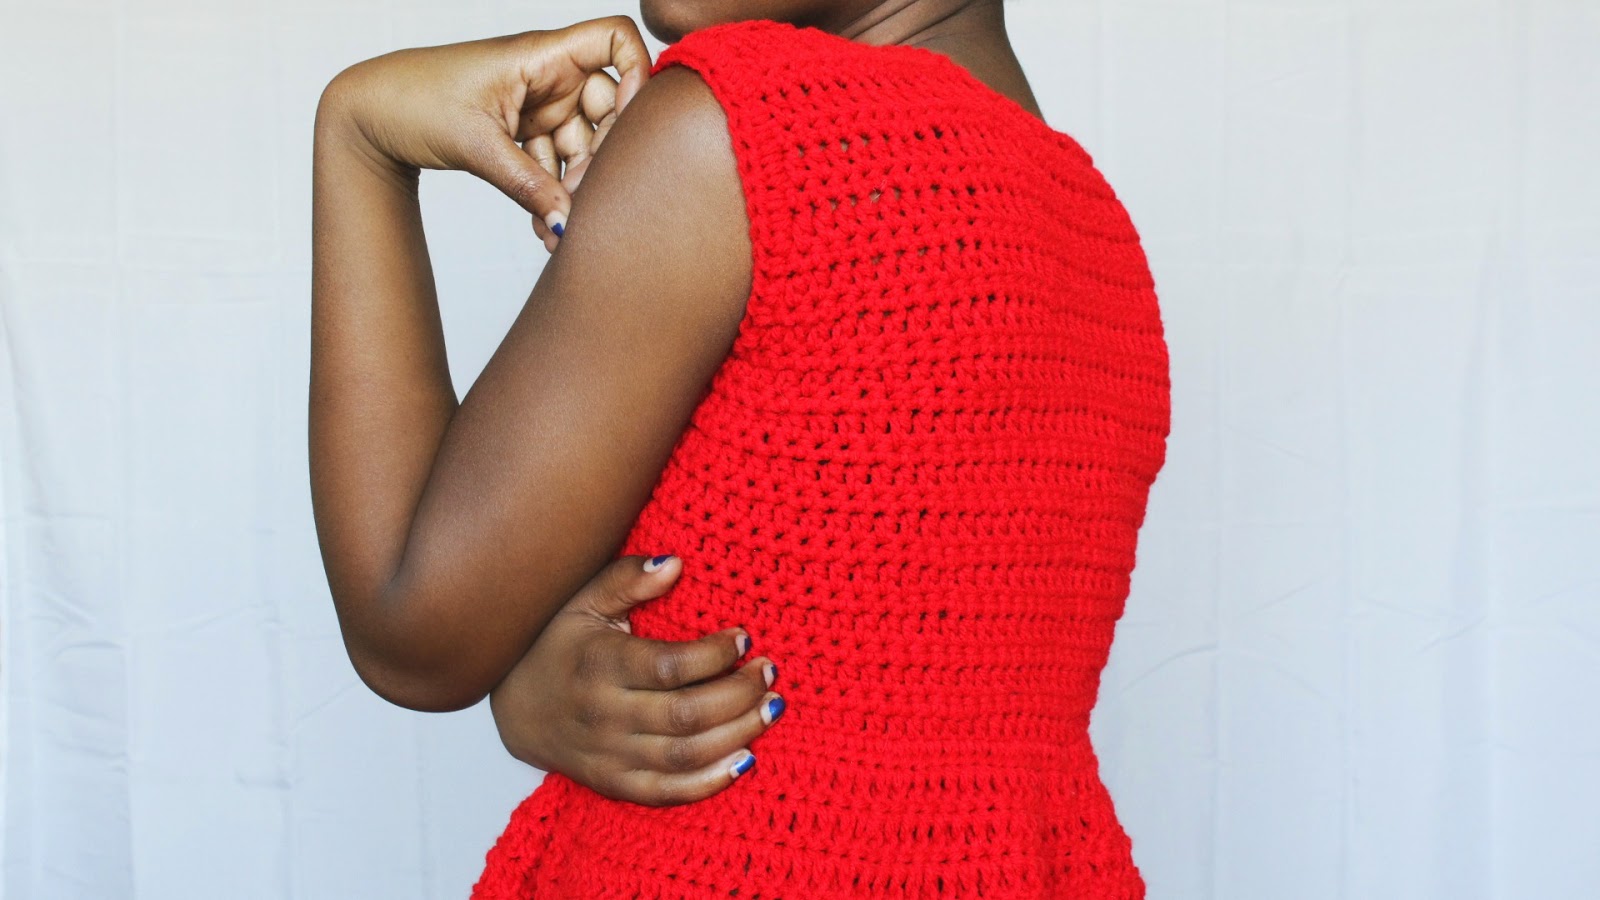
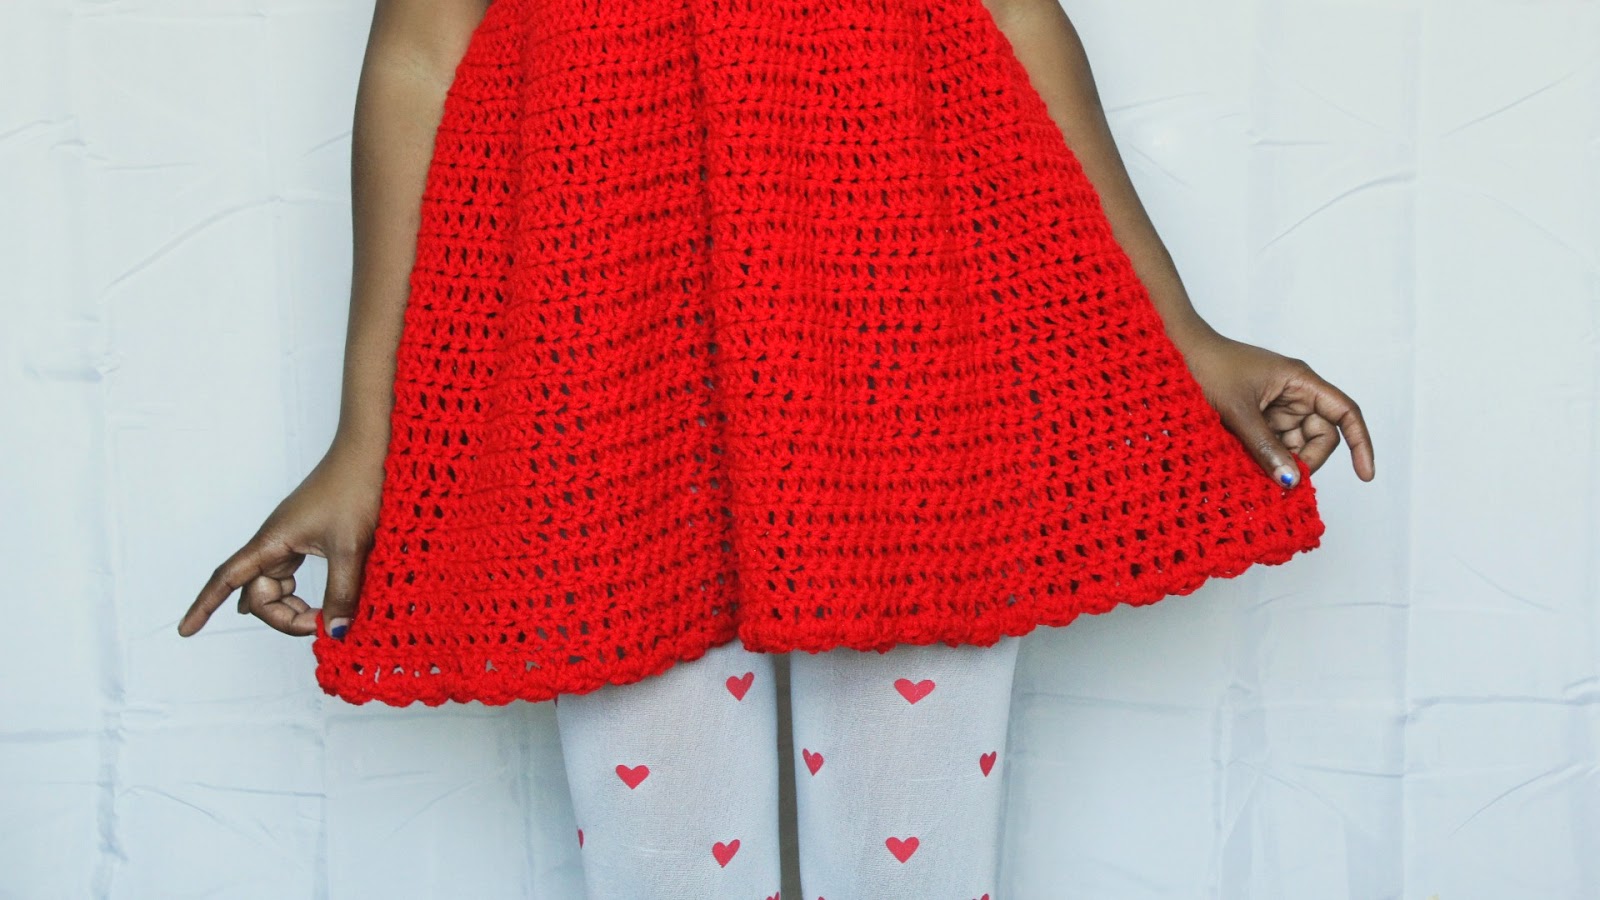
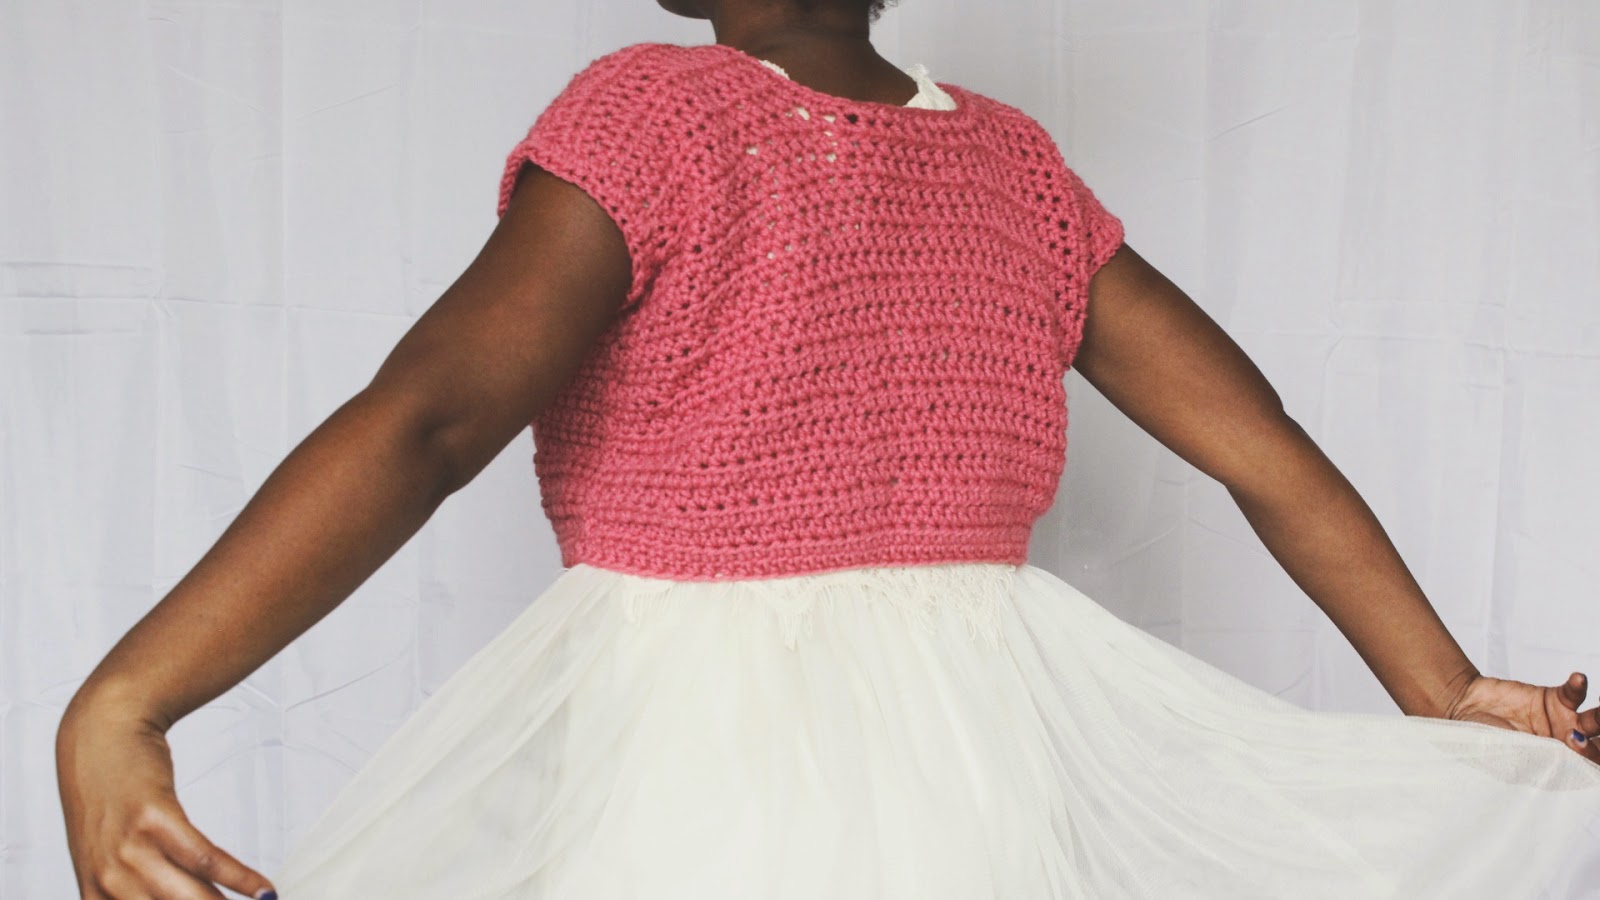
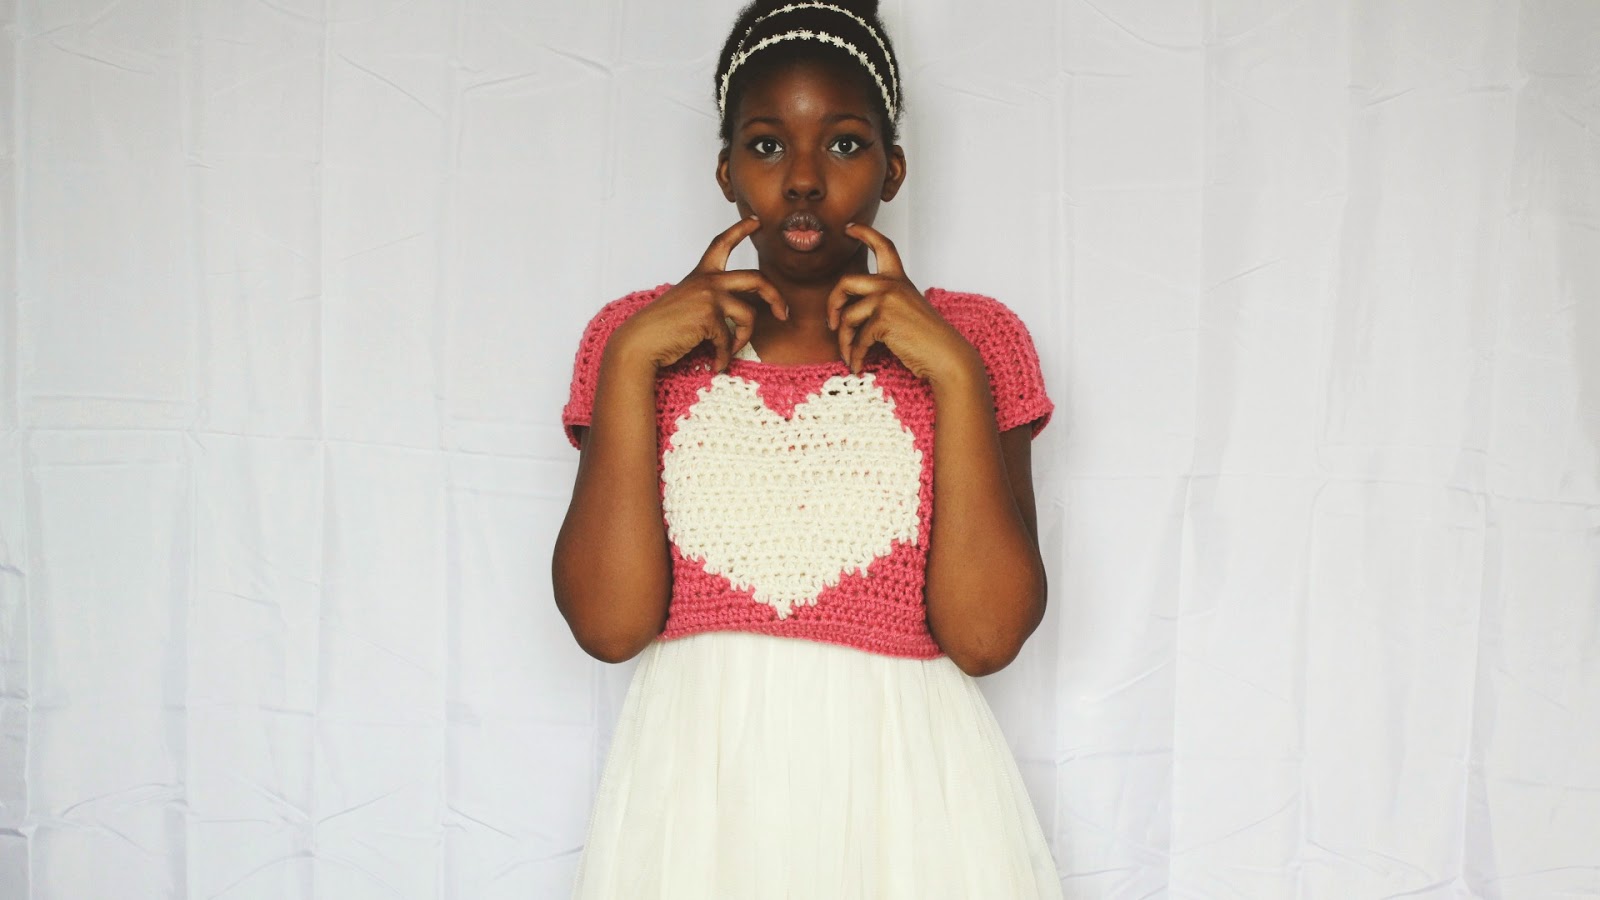
Hello there! Happy Thursday to you! With the last round of hearts and all things sweet, this handmade crochet dress was constructed with love on the brain. I created this dress on a complete whim, having the design in my mind and just winging it through trial and error, reworking it so that it would be what I imagined. I'm quite elated with how it came out and I cannot wait to create more for throughout the year.

What I love about this crochet dress, is that it is insanely comfortable, (which is what I aim for with all of my designs) is how comfortable and easy it is. You don't have to lose the cuteness or the style just because of comfort, you truly can have the best of both worlds. This dress entirely proves it, feels like I'm wearing a lovely freeing sweater and that's pretty awesome in my book.


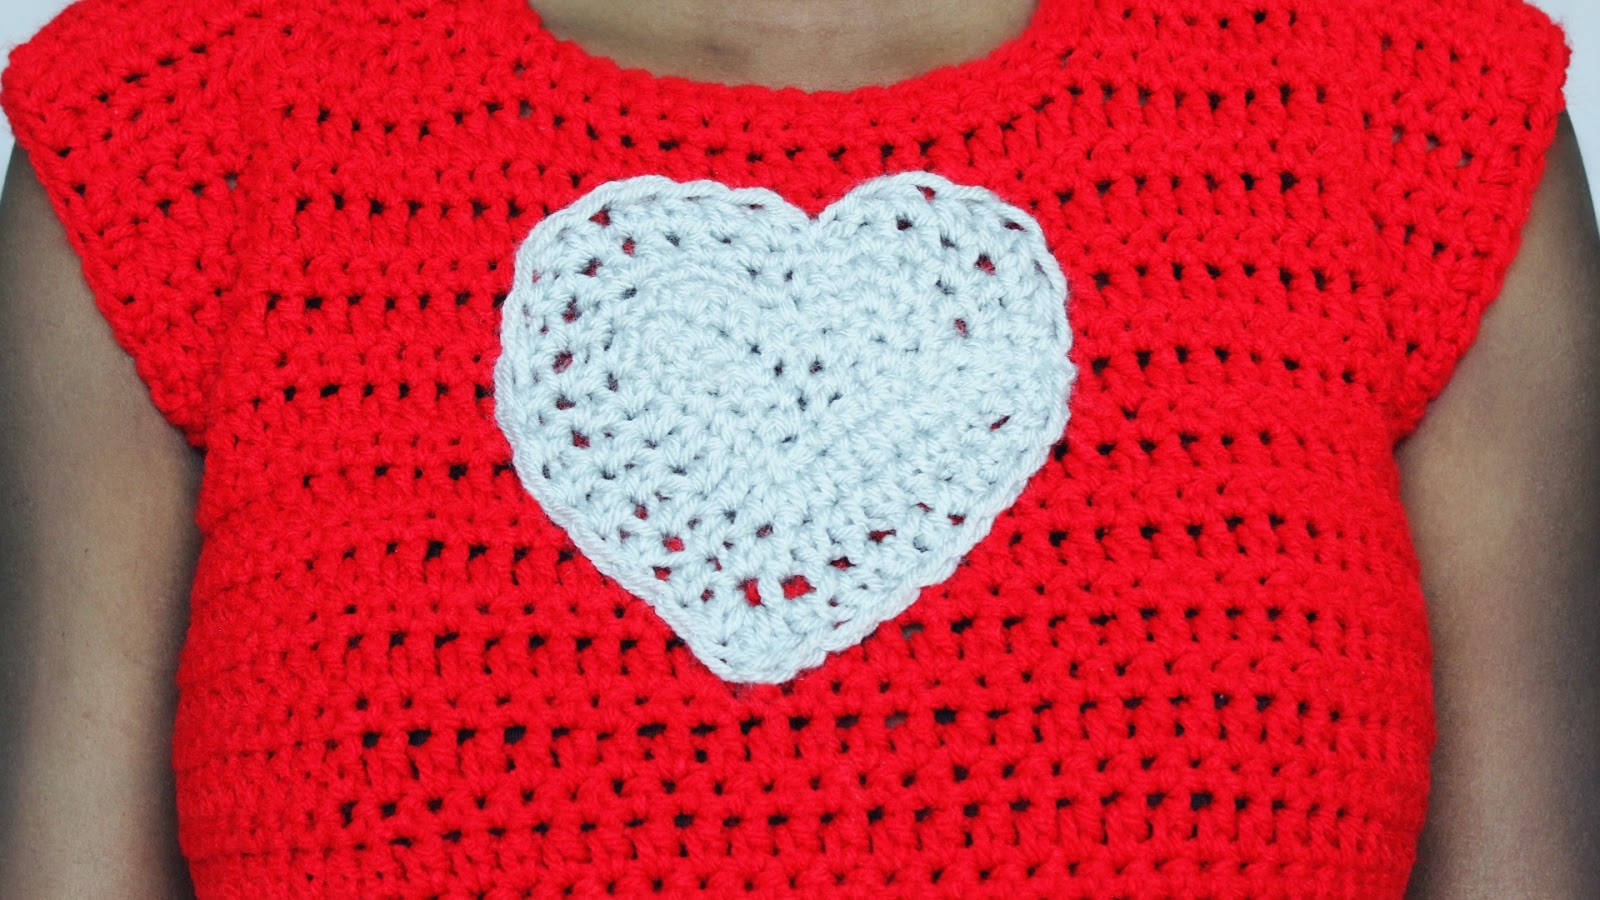
The Big Heart Cropped Crochet Sweater Pattern Available Here

ashlee elle.

Tuesday, February 10, 2015

DIY: How To Crochet A Heart Scarf// Free Patern!

Hello there! Happy Tuesday to you! This super easy crochet pattern is brought to you by all things hearts! Valentines Day is swiftly approaching and I entirely wanted to make something in the lane of love. Even if you don't truly celebrate that day, this scarf is just a super cute way to add a bit of fun to your outfit!

This free crochet project is still maintaining my goal to entirely utilize my scrap yarn bin and recycle the yarn I have just a little bit of. So this project is entirely under one skein for both bits of yarn. 

Oh and my crochet skirt, worn in the photographs, is available in pattern and made to order on my Dream Crochet Shoppe!

Ingredients:   
Crochet Hook>> H8-5.00MM
Scissors
Scrap Yarn used>>1 Skein of (red) and 1 Skein (grey)
 of Red Heart Super Saver

 
Stitch guide
SC= single crochet
 

HDC= half double crochet
SS= slip stitch
ST(S)= Stitch(es)
CH= chain 


To start the crochet scarf, using your grey yarn.
Step 1
CH 20
*Row 1: HDC the entire Row, Turn
Row 2: DC the entire Row, Turn,
(*Note: You will be alternating between HDC and DC until you reach Row 50.)
Row 51: SC the entire last Row, SS, cut yarn off to weave in the end.

*Note: I used this pattern to create the hearts, I modified it a bit when it came to the finishing technique.

To create 2 hearts, using your red yarn
Step 1
CH 7
Skip the first ST
Row 2-3: SC in the 6th STS, turn, CH 1
Row 4: SC into the first 3 STS only, turn CH 1
Row 5-6: SC in the 3 STS
Once completing the last row, SC around the entire heart.
When you hit the "dip" where the middle of the heart is, SS instead of SC.
Once you hit the bottom of the heart, SC two times into the ST.

*Once you hit the beginning of the heart.
You will begin HDC around the heart at the corners of the heart, HDC two times in the same ST, in the dip, SS instead of HDC and at the bottom of the heart. HDC two times into the same ST again.
When you are at the beginning of the SS, cut off remaining yarn and sew in the edges.

After completing the hearts, thread your red yarn into your yarn sewing needle. You will then sew the hearts unto the bottom of the scarf at both ends.
ashlee elle.

Thursday, February 5, 2015

HandMade: The Big Heart Cropped Crochet Heart Sweater!

Hello there! Happy Thursday to you, or Happy Scandal night for my Shonda fans out there! With Valentine's Day right around the corner I thought I'd share one of the projects I had been working on in the spirit of heart day. 

This crochet cropped sweater with a graphic of a lovely big heart is a fun project you can either create for you or for a loved one. Made for any crocheter, the pattern was created to accomodate all skill levels.

What I love about this sweater, is that it is perfect for layering with a long sleeved shirt or you can make the sleeves a big longer if you choose. This is actually one sweater I will wear year round, regardless of the holiday, it's just perfect for any occasion!

The Big Heart Cropped Crochet Sweater Available Here
ashlee elle.

Tuesday, February 3, 2015

DIY: How To Crochet A Mason Jar Cozy// Free Pattern!

Hello there! I've been staring at my scrap yarn bin for quite awhile, entirely overwhelmed by the amount of yarn that is entirely useable. I have this weird notion, believing that almost every time I start a new project, it must require new yarn. That mindset is about to change. My next few projects are going to be right from that bin, mixing and matching, recreating new possibilities utilizing a few strings or so! 

Onto this project, I've been wanting to get into creating crochet home goods and little accessories for around the house and here is my first little project! This mason jar is filled with random buttons and I just had it sitting on top of my bookcase, but I felt it needed a little spruce, a little touch of funk to fit in, so I swiftly hit up my yarn to create some magic!


Ingredients:  Crochet Hook>> H8-5.00MM
Scissors
Scrap Yarn used>>1 Skein of (Hot Pink) and 1 Skein (Grey)
1 Skein (Yellow)
1 Skein (Teal) of Red Heart Super Saver
Stitch guide
SC= single crochet
HDC= half double crochet
SS= slip stitch
ST(S)= Stitch(es)
CH= chain 

YO= yarn over


With the yellow yarn.
CH 4
Connect the last ST to the very first ST to create a little circle.
CH 1
Within the circle,
HDC 8 times
Connect the last ST to the very first ST, CH 1
Row 1: HDC two times into each ST, for a total amount of 16.
Connect the last ST to the very first ST, CH 1
Row 2: HDC once in every ST
Connect the last ST to the very first ST, CH 1

Row 3: HDC once in every ST
Connect the last ST to the very first ST, SS and cut off yarn. 

With the pink yarn.
Insert Hook into the yellow yarn ST to start.
Row 4: *HDC into the first ST,
Skip the following ST and HDC into the next ST after the skipped ST.
*Repeat this method until the end of the Row.
 Connect the last ST to the very first ST, CH 2
Row 5: *YO 2 times into the open space,
(Where you left the skipped space during Row 4)
CH 1 and repeat YO 2 times into the open space,
*Repeat this method until the end of the Row.
Connect the last ST to the very first ST, SS and cut off yarn. 

With the teal yarn.
Insert Hook into the pink yarn ST to start.
Rows 6-7: *YO 2 times into the open space,
(Just like Row 5)
CH 1 and repeat YO 2 times into the open space,
*Repeat this method until the end of the Row.
Connect the last ST to the very first ST, SS and cut off yarn. 

With the yellow yarn.

Insert Hook into the teal yarn ST to start. 
Rows 8-9: HDC in all the STS for both rows, 
Connect the last ST to the very first ST, SS and cut off yarn. 


With the pink yarn.
Insert Hook into the yellow yarn ST to start.
Row 10: *HDC into the first ST,
Skip the following ST and HDC into the next ST after the skipped ST.
*Repeat this method until the end of the Row.
 Connect the last ST to the very first ST, CH 2
Row 11: *YO 2 times into the open space,
(Where you left the skipped space during Row 10)
CH 1 and repeat YO 2 times into the open space,
*Repeat this method until the end of the Row.
Connect the last ST to the very first ST, SS and cut off yarn.

With the teal yarn.
Row 12: SC the entire Row,

Connect the last ST to the very first ST, SS and cut off yarn.Weave in the ends!
ashlee elle.