Showing posts with label dream in vintage crochet. Show all posts

Tuesday, August 4, 2015

DIY: Strawberry Crochet Bag>> Free Crochet Pattern!

Hello there! Hope you had a lovely weekend and a wonderful start to your week! I can't help, but have Strawberry Fields forever stuck on repeat in my head as I compose this post! Though my love for fruit inspired items have extended unto the creation of this bag and I am quite elated to share this free pattern with whomever!
Ingredients:    

Crochet Hook>> H/8-5.50MM 
Craft Scissors  
Yarn Sewing Needle
Yarn used>>1 Skein from Sugar N' Cream (Colors: Red/Green/White)


  Stitch guide:   

HDC= half double crochet// SC=single crochet// DC=double crochet// SS= slip stitch //ST(S)= stitch(es)// CH= chain R[number]= Row
Using Red Yarn
CH 3
Connect the last ST to the very first ST by SS, CH 1.
R1: HDC two times into the very first ST, then continue to HDC [only once] into the next ST, into the following ST HDC [two times] and HDC [only once] into the next ST... (**Repeat method until the end of the Row, you will SS to complete Row.)
R2: **HDC two times into the first TWO STS, then continue to HDC [only once] into the next ST [3rd ST], into the following 2 STS, HDC [two times] and HDC [only once] into the next ST... (**Repeat method until the end of the Row, you will SS to complete Row.) 
R3: **HDC two times into the first THREE STS, then continue to HDC [only once] into the next ST [4th ST], into the following ST HDC [two times] and HDC [only once] into the next ST... (**Repeat method until the end of the Row, you will SS to complete Row.)  
R4: **HDC two times into the first FOUR STS, then continue to HDC [only once] into the next ST [5th ST], into the following ST HDC [two times] and HDC [only once] into the next ST... (**Repeat method until the end of the Row, you will SS to complete Row.) 
R5: **HDC two times into the first FIVE STS, then continue to HDC [only once] into the next ST [6th ST], into the following ST HDC [two times] and HDC [only once] into the next ST... (**Repeat method until the end of the Row, you will SS to complete Row.) 
R6-R17: HDC into all of the STS for ALL of the Rows into ALL of the STS, you will SS to complete work. 

To create the "white specks"
Photo example on the right [above]
Turn the bag inside out and cut a short strand of white yarn. You will loop the strand of white yarn (using a yarn sewing needle or a hook) around any random stitch around the bag. Tying the strand into a knot on the inside of the bag.
Using Green Yarn
Insert hook into the complete red portion of the finished crocheted piece.
R18-R21: HDC into all of the STS for ALL of the Rows into ALL of the STS, you will SS to complete work on row. Continue repeating method.
R22: **HDC into the first four STS, CH 2, Skip 2 STS, HDC into the following four STS...(**Repeat method until the end of the Row, you will SS to complete Row.)
R23: SC into all of the STS for the Rows into ALL of the STS, you will SS to complete work on row.
To create the drawstring.
CH 81
Cut and knot to secure chain.
Insert chain into the open spaces created by Row 22, to create the drawstring effect.

To create the straps.
CH 15
R1-R40: [Or however long you desire the strap to be] HDC into all of the STS for ALL of the Rows into ALL of the STS, you will SS to complete work on row. Continue repeating method until you hit the final Row. Row 40, SS to complete final work.
Next, Fold the complete crocheted piece, vertically and using your yarn sewing needle and a strand of yarn, sew the straps together.
Next, You will sew the ends of the straps to the side of using your yarn yarn sewing needle and a strand of yarn.

ashlee elle.

Thursday, July 16, 2015

HandMade: The Eiffel Rose Crochet Top!

Hello there! Hope you're having a lovely week! I've had this yarn in my "to make" stash for quite awhile, pondering over various designs I could create utilizing it. When the idea of of off the shoulder top with a bit of an over-sized "flair" to it, sent the process into overdrive. The project is truly a fun, easy breeze to a top that will bring such color and vivacity to any outfit! I am actually considering extending the design and creating a dress, not far from this pattern construction. It's definitely a color staple that I am quite elated to add to my crochet collection!


Pattern Details:
The yarn I used:  The yarn I used: Red Heart Boutique "Unforgettable" in Color "Parrot" [2 Skeins]
The hook I used:I/9-5.50MM


Get The Eiffel Rose Crochet Pattern at:

x ashlee elle.

Tuesday, July 14, 2015

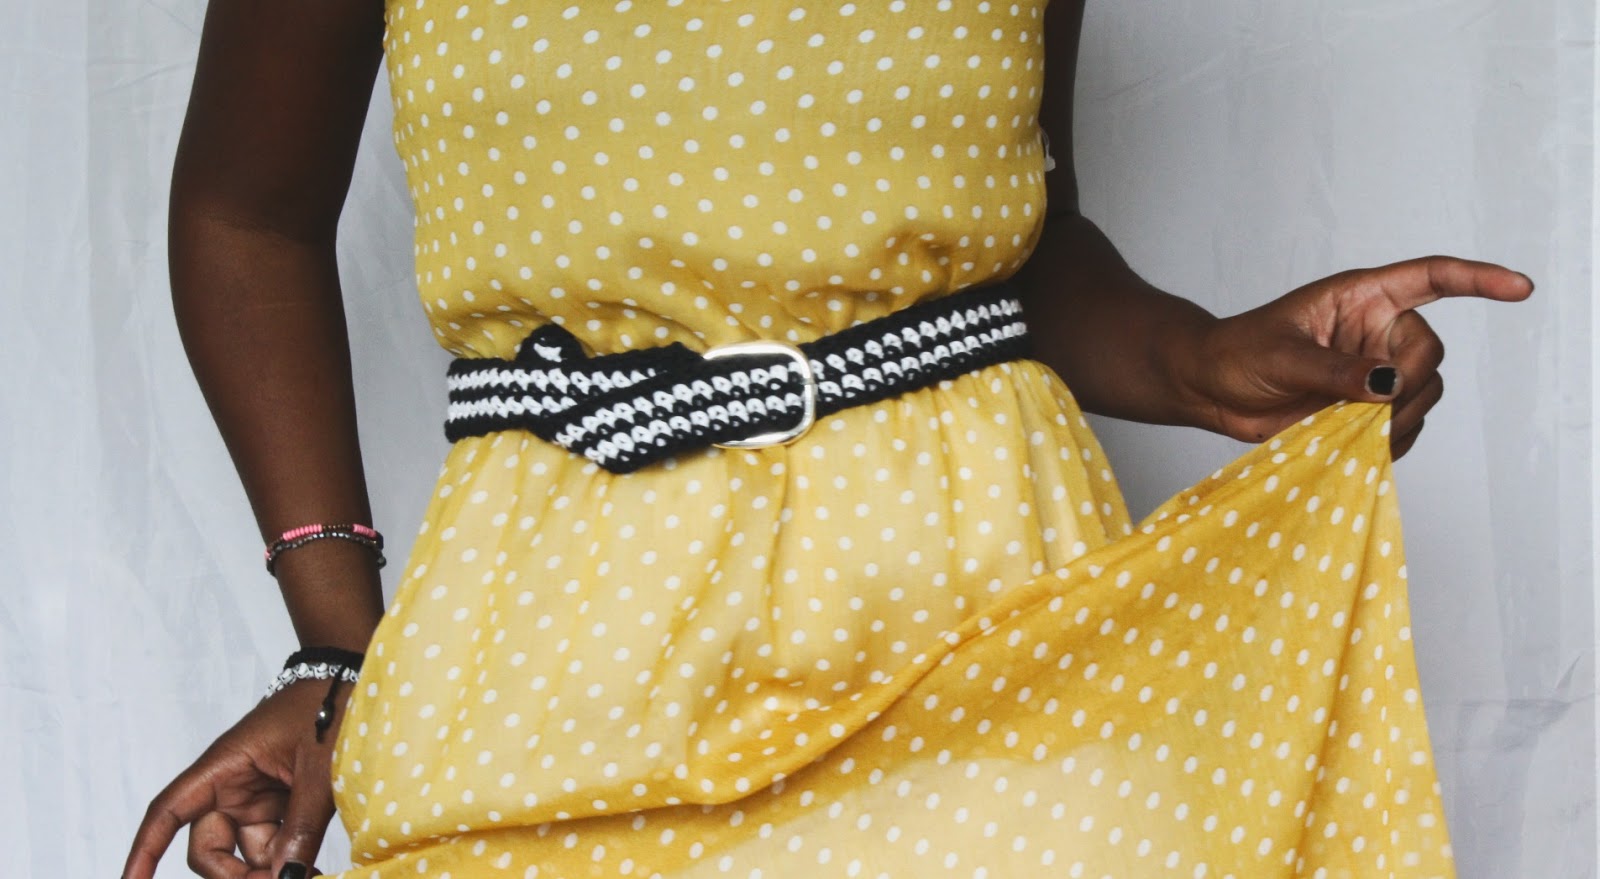
DIY: How To Crochet a Belt// Free Crochet Pattern!

Hello there! I hope you are having a nice start to your week! With this crochet belt I was entirely inspired by woven belts worn during the Summer time and I wanted to create my own version to share!
Ingredients:    
Crochet Hook>> H/8-5.50MM 
Craft Scissors  
Yarn Sewing Needle
Yarn used>>1 Skeins of  Each from Sugar N' Cream (Colors: Black & White)

Size Small (can be created to various sizes)
Belt Buckle [from Michaels] 


Stitch guide:   

HDC= half double crochet
SC=single crochet SS= slip stitch
ST(S)= stitch(es)
CH= chain
R[number]= Row
 STEP 1
CH 98 (or half desired waist measurement) [34 inches length] [2.5 inches width]
[Black] R1:  HDC the entire Row into All of the STS, and at the end of the Row, you will change colors to start Row 2.
[White] R2:  HDC the entire Row into All of the STS, and at the end of the Row, you will change colors to start Row 3.
[Black] R3:  HDC the entire Row into All of the STS, and at the end of the Row, you will change colors to start Row 4.
[White] R4:  HDC the entire Row into All of the STS, and at the end of the Row, you will change colors to start Row 5.
[Black] R5:  HDC the entire Row into All of the STS, and at the end of the Row, you will SS to complete work.

STEP 2
At the end of the crocheted piece, at the ends, single crochet across for a finishing technique. SS to complete work and weave in the remaining strands. [photo reference above on left.]

STEP 3
With the belt buckle, slip half an inch of the crocheted piece through the buckle, fold it over and with your yarn sewing needle, thread a bit of yarn. Sew the folded crocheted piece and sew the piece, using your yarn sewing needle. [photo reference above on right.]
x ashlee elle.

Thursday, May 21, 2015

HandMade: The Evelyn Maxi Crochet Dress!

 Hello there! Hope you're having a lovely week! I had been wanting to create a semi-maxi crochet dress in quite awhile, so when I came across the color of this yarn, I knew it was meant to be. This dress is absolutely perfect for the Summer time, extremely comfortable and not heavy at all which are two attributes that go hand in hand when creating a piece like this dress. With utilizing basic crochet techniques and a repeating method throughout the pattern, this dress is an easy make and a dream to wear!

Pattern Details:
The yarn I used: 4 Skeins in Fuchsia [ Yarn]
The hook I used: H/8-5.00MM


Get The Evelyn Maxi Crochet Dress Pattern at:

Tuesday, April 28, 2015

DIY: The Crochet Drawstring Skirt// Free Pattern!

Hello there! This project was actually inspired by an older project I created when I first started this blog. So I thought I would bring it back to life with a new improved twist!

Ingredients:    
Crochet Hook>> H/8-5.00MM  & G/6-4.25MM
Craft Scissors Yarn Sewing Needle
Yarn used>>1 Skein Each of Cream/Hot Pink (Caron Simply Soft Yarn) Medium 4

Measurements of Top:   Length of skirt: 15 inches  
Waist band: 19 inches Width of skirt: 21.5 inches Size Small 
Stitch guide: 
DC= double crochet   
SC= single crochet
SS= slip stitch
ST(S)= stitch(es)
CH= chain R[number]= Row  

Step 1  (left to right)
This first step is to create the band for the waistband. Using the hot pink yarn first and

H/8-5.00MM hook/
CH 93
R1-R8: SC in all of the STS for all of the Rows, turn work when complete after each Row, for the final Row, SS to end the step.

For the finishing technique, SC around the entire finished crocheted piece, SS at the very end to complete the piece.
CH 191 for the Drawstring. 
Step 2 (left to right)
Place the Chain of 191 as the Drawstring, into the finished crocheted piece, lie it inside of the piece, fold the piece horizontally. Now sew around the crocheted piece with the drawstring inside, leaving the opening for where the drawstrings will be.

Once complete, sew the Back of the opening (where the drawstrings are) to secure the band together.
Step 3 (left to right)
Next, to start the bottom of the skirt. Using your G/6-4.25MM hook and the hot pink yarn. 
Note: You will connect the end of the Row, by SS.
R1:  DC into the first ST, *DC two times into the following ST, DC into the following ST... *Repeat method until the end of the Row.
R2-R12:  DC into all of the STS, for all of the Rows, at the end of the Row Row 12, SS to complete the skirt.

Now to Switch colors for the skirt.
Using your G/6-4.25MM hook and the cream yarn.
R13-R17:  DC into all of the STS, for all of the Rows. 
x ashlee elle.

Thursday, April 9, 2015

HandMade: The Whimsy Crochet Top! Pattern Now Available!

Hello there! Hope you're having a lovely week! This handmade crochet top was inspired by baby doll dresses and easy breezy Spring days. I wanted to create a top that had a mixture of being form fitting as well as roomy. It's entirely a design I plan on recreating in different styles as well as colors.

What I love about this top, is that it doesn't feel heavy at all and I can entirely wear it year round. One of the main things I strive to aim for when creating items is versatility and a strong comfort level. This top owns both of those wondrous attributes and I absolutely love wearing it!

Get The Whimsy Crochet Top Pattern at:

x ashlee elle.

Thursday, April 2, 2015

Hand Made: The True Peach Crochet Dress//Pattern Available!

Hello there! Hope you're having a lovely week! This handmade crochet dress was supposed to be in the music festival theme crochet project a few weeks ago, (made a handful of dresses) but I decided to leave it out and share it at a later time!

What I love about this dress, is how comfortable it is for the Spring and Summer time. Not heavy at all and I could either layer it with a swimsuit underneath for the beach or throw a slip underneath for a simple Spring dress! This dress can be created in any size and is a perfect handmade creation for you or for a loved one!

Get The True Peach Crochet Dress Pattern at:

x ashlee elle.